To make navigating the walk-through easy for you, it has been divided into four
sections, one for each disk, with a terrain explanation section at the
beginning. If you need help on a particular disc simply skip to the section for
that disc and you will find it further divided into separate sections for each
location.
During your travels, you will encounter various types of terrain, and you will
use several different types of vehicles. Below is a chart detailing the types of
terrain, along with the frequency of encounters with those types and what
vehicles you can disembark from on them.
|
Terrain
|
Encounter Rate
|
Disembark from
|
|
Beach
|
Normal
|
Boat, Chocobo
|
|
Desert
|
High
|
Airship, Chocobo
|
|
Forest
|
High
|
Chocobo
|
|
Grassy
|
Normal
|
Airship, Boat, Chocobo
|
|
Swamp
|
High
|
Airship, Chocobo
|
 |
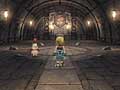
The first meeting onboard the Prima Vista
airship. |
Disc 1 lays out the events that will unfold throughout the next two discs, and
focuses more on introducing characters than actually getting into the thick of
the plot. It is important to pay attention during this disc so that you will
know what is happening in the land around you. The amount of freedom that you
will have on Disc 1 is very limited.
Principle Character(s): Zidane
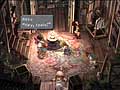
When the game begins, walk forward and light the candle in front of you. This
will light the room, and you will be approached by Blank, Cinna, and Marcus.
After a very short exchange, you will be attacked by Baku, your boss, in a
monster costume. The battle will not last long, as Baku's costume will come off
during the battle and everyone will recognize him, ending the battle.
Baku will then take you into a meeting room, where he'll discuss your mission
with you. Tantalus (your thieves group) is going to head for the Kingdom of
Alexandria. Once there, you will kidnap the heir to the throne, Princess Garnet
(or Dagger, as you will come to know her).
To perform this task, the members of Tantalus will dress up as performers who
are at the castle to perform a popular play called I Want to Be Your Canary. The
actual kidnapping will be left to you and Blank. They make everything sound so
simple...
|
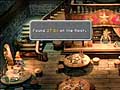
Vivi finds 27 gil when exploring the town of
Alexandria. |
Principle Character(s): Vivi
After Vivi uprights himself and the child next to him gives him the ticket, walk
to your left and grab the potion that Vivi will find, then walk into the door on
your right. After passing through the door, you will see a woman at work. Talk
to her if you like, then climb the ladder. On the dresser, you will find the
fang card. Below the ladder, you will find a potion under the table and nine gil
by the bed.
Next, leave the building and walk to the lower end of the screen, heading to the
next screen. On the next screen, head to the lower-left corner and grab the
zombie card, then head to the upper end of the screen, behind the statue, and
you will find the lizard man card. Lastly, near a building on the upper
left-hand side of the screen, you will find the Sahagin card. Grab it, then
return to where you were when the kid returned your ticket to you.
On the upper left-hand side of the screen, near some barrels, you will find a
potion. Grab the potion, then continue to the top of the screen and enter the
next screen.
Walk to the lower end of the screen, near the grass, and grab the 33 gil lying
on the ground there. Then move to the left-hand side of the screen and grab the
goblin card. At the top of the screen, you will find a door through which you
can enter the local tavern. Once in the tavern, move to the left side of the
screen, where you will find 27 gil and a flan card, then move to the right side,
where you will find a potion. Grab everything, then leave and head to the left.
In a building on the right, Doug's Item Shop, you
will find 38 gil on the floor, but otherwise, you will not find much on this
screen. Instead, head onto the next screen, where you will find a phoenix pinion
by a cart on the upper end of the screen, and if you show your ticket to the
ticketmaster, he will tell you it is a fake, but he'll give you a goblin card, a
fang card, and a skeleton card.
If you walk through the door in the upper right-hand corner of the courtyard,
you will find yourself in the armory. On the right, near the top of the screen,
is a remedy. Walk slowly so that you don't accidentally walk onto the next
screen, however. After you have the remedy, head to the right. On the next
screen, you will find an ether on the right-hand side. Grab it, then walk to the
left, back into the courtyard.
From here, head to the left side of the screen, and you will trip by a guy
putting up a sign. After that, a rat kid will come up to you and offer to get
you into the show if you become his slave. Accept the offer, and the rat kid
will grab the ladder on the screen and run off. Afterward, Alleyway Jack will
walk onto the screen. When he does, talk to him fast so that he doesn't mug you.
He will show you how to play cards, and even play a few rounds with you. Play
him if you like; he will give you the chance to win the Cactuar card.
After the card battle, walk to the bottom of the screen, to the left of the next
screen, and to the top of the next one to return to the square. Finally, walk to
the left to re-enter the alleyway.
This time, head down on the screen and follow the rat kid with the ladder. He
will take it up a tower and introduce you to Kupo, a moogle. If you like, you
may take this opportunity to save the game, and if you look into mognet, Kupo
will ask you to take a letter to another moogle.
When you are ready, grab the potion on the right-hand side of the screen and
follow the rat kid up the ladder. He will lead you across the roof, and in the
process, you will finally learn his name, Puck. You will also confirm Vivi's
name for the first time as well. After following Puck for a little while, you
will finally wind your way into the castle to watch a rather nice cutscene.
Principle Character(s): Zidane
After some dialogue, Zidane and two comrades will rush onto the scene and begin
a mock fight on the stage. Now, because this is a stage fight, magic will have
no effect. Instead, focus on attacking your enemies and, if you are quick, you
shouldn't lose any party members.
At this point, the game will continue with more acting from Zidane and Blank. At
one point during this sequence, however, you will have a fight sequence. It is
very important that you impress as many nobles as you can during this, as the
nobles more you impress, the better items you will get. If you manage to impress
everyone, then Steiner will get a moonstone later on, and you can also obtain a
silk shirt, an elixir, or ether. Your party will also obtain a certain amount of
gold depending upon how many nobles are impressed, so take your time and retry
as much as you think is necessary, trying to impress as much as possible. If you
try more than approximately ten times, you may want to reboot - from what I've
seen, it appears to get harder and harder to get a very good score the more
tries you take.
Principle Character(s): Zidane, Dagger, Steiner, Vivi
This section will begin with a conversation between Zidane and Blank. First walk
to the left to enter the next screen, then run straight up the steps to the
left. You will now be met by a hooded girl. Simply examine her, and you will
discover that she is Princess Garnet.
After Zidane chases after Princess Garnet, the screen will shift to Zorn and
Thorn, two court jesters. They will, in a panic, run to the queen. They will not
take long, but once they reach the queen, the game will shift to Steiner, and
you will set about finding Princess Garnet.
Begin by walking to the right two screens, and order the guards you find there
out. In the lower-left corner of the room, you will be able to grab a phoenix
down, and on the right side there is the moogle, Mosh.
The left side of the screen will have a register of all the Knights of Pluto,
which is Steiner's group. If you wish, you can go through the castle and gather
them all. If you do, you will gain an elixir, but it really isn't worth it. If
you want the elixir, though, it doesn't take long and it should be easy to
figure out. Otherwise, simply walk two screens to the left, then up one.
Next, go down the stairs you find on this screen and head down two screens to
leave the castle. Once you are outside, head left, then into the tower you find
there. Head to the top of the screen on the next one, then continue up the
stairs there to the very top of the tower, passing two screens.
At the top of the tower, you will see Princess Garnet being chased by Zidane, at
which point she will drop from the tower on a line, with Zidane and Steiner
following after. You will also regain control of Zidane at this point.
Follow Princess Garnet as she attempts to flee from you. In chasing her, you
will end up running to the right one screen, then passing by Ruby, and then
chasing Garnet to the right for another screen.
|
The queen howling in anger as the Prima Vista
makes its escape. |
After you catch Princess Garnet, she will reveal who she is and, of all things,
beg you to kidnap her. Zidane, of course, accepts, and vows to kidnap her. Cinna
then breaks in and brings the two of you out of the room, right before Steiner
breaks in.
Zidane and Cinna then drop down an escape hatch in the next room. When Steiner
and his guard try to follow there are a few... complications. On the next
screen, head through the door on the left. You will be confronted by Steiner
there, and a battle will ensue.
Simply order all of your people to attack Steiner with physical attacks. You
may, however, also wish to order someone to steal from Steiner, but after that,
simply focus on attacking him, and eventually the battle will end with several
oglops set free, distracting Steiner.
After Zidane and Garnet flee, you will see a bit more of the play, then the
focus will return to Zidane and Garnet. Steiner will bust in on you just as
Zidane and Princess Garnet rise to the stage. Naturally, Steiner follows them
immediately and becomes extremely confused by what he sees playing out on stage,
not realizing that he has become part of the play.
Vivi will end up being chased onto the stage and, in a rather humorous act, sets
Princess Garnet on fire, forcing her to throw off her disguise. Steiner will
realize what is happening, sort of, and will then begin a fight with Zidane,
Vivi, Princess Garnet, and Marcus.
This battle, like the last with Steiner, is exquisitely easy. Simply order your
two fighters and Garnet to attack Steiner, and order Vivi to use fire on Steiner
or his guards. One round of fire is able to take out a guard, but you may need
to use a couple on Steiner. Overall, this battle should prove quite easy.
Once the fight is over, the airship will begin to take off, carrying everyone
away. The queen, of course, becomes quite enraged by this and attempts to stop
the airship from taking off, and she even launches a bomb onto the deck, where
the third battle with Steiner begins.
Your goal at this point is to make Steiner turn around and realize what is
behind him, the bomb. To do this, you need to hurt him as much as possible using
physical attacks and Vivi's fire attack. After Steiner sees the bomb, the battle
will be over and your airship will flee the castle area. The queen, quite
naturally, will be extremely furious, but you will escape - at least until you
crash.
Principle Character(s): Zidane, Dagger, Steiner, Vivi
After the crash, there will be a lot of commotion, but after it settles, you
will be introduced to Active Time Events. While it is not necessary to watch
them, you will learn more about different characters and the story by doing so.
This first one shows Vivi and Princess Garnet in peril, with something about to
attack Princess Garnet.
Once you are done viewing the Active Time Event, you will be returned to Zidane,
who is, quite fortunately, next to a moogle who will allow you to save. After
saving, walk to the cargo above the moogle and you will find a phoenix down.
Grab this, then head through the log at the bottom of the screen.
Run to the right of this screen and exit there to the next screen, where you
will see Vivi talking about Princess Garnet, who is in trouble. If you walk
forward, you will come to Steiner, who is trying to retrieve Princess Garnet
from a plant monster. Rush up and help him. Simply perform physical attacks, or
dyne if you can, until it flees.
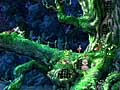
|

Having escaped, the Prima Vista crashes in the
Evil Forest. |
After the initial fight, Steiner, Zidane, and Vivi will have a few words, then
the plant monster will return to snatch Vivi. Fortunately, Vivi helps you this
time by using fire on the plant monster. Order Zidane to open by stealing from
the monster, then resort to physical attacks from him and Steiner.
When Prison Cage has been defeated, your party will be poisoned, but
fortunately, you will be returned to the airship, where you are treated. When
you resume control of Zidane, open the chest to the right side of the screen to
grab the bronze gloves, then walk to the left of the screen, where you will be
able to check out three Active Time Events. The first one is about Ruby, the
next concerns Steiner, and the third revolves around Cinna. All three are brief,
and they won't take up much of your time.
Next, walk down the stairs and grab the wrist in the top left of the screen,
then walk through the door on the right to see Vivi. In his room, you will find
an ether in a chest in the top left, and 116 gil on the bed. After grabbing
everything, talk to Vivi. The conversation will be rather short, and after you
are done talking to him, leave the room.
After you leave the room, you will have a choice to make. While either is
acceptable, for the purpose of this walk-through we will choose to search for
Garnet since Zidane promised to do that.
To continue, walk to the left side of the screen and head through the opening
there. Open the chest on the bottom of the screen and grab the ether, then
continue down the stairs. Once you are down the stairs, walk through the door on
the right, and you will run into Baku, who will challenge you for breaking the
rules. To fight, he will direct you to head to the cargo room.
First open the chest at the bottom of the screen and grab the potion, then head
out through the door to the left. Before challenging Baku in the cargo room,
grab the rubber helm from a chest at the top of the screen. Once you have the
rubber helm, challenge Baku.
Fortunately, the battle with Baku is not overly difficult. Be careful and use
potions regularly. Since you should have found enough, this should not be a
problem. You will also want to steal from Baku, as he will have a hi-potion and
an iron sword for Steiner. After several good hits, Baku will back down, and you
will be victorious.
After the battle, head up the stairs and talk to Steiner, then head to where
Vivi was and obtain his assistance as well. After he joins you, you will
probably want to take the time to equip and organize the abilities of your party
members. This shouldn't take long (thank God for the change from the wretched
FFVIII system), and your party will benefit greatly from this reorganization.
After you are done, head back down the stairs to where you beat Baku and walk to
the lower part of the screen. On the next screen, Blank will approach you about
Princess Garnet and give you Blank's medicine. After talking to Blank, walk back
in and grab the leather hat in the left-hand side of the room, then leave the
airship again.
Save again with the moogle outside the ship, then head through the log at the
lower end of the screen. After you are through it, you will get to see another
Active Time Event, which shows you the crew members try to boost morale back on
the airship. After the Active Time Event, walk to the right of the next screen,
to the top of the next, up through the log on the next one onto the grass, and
finally to the top of this screen.
The next screen is a sort of safe haven with a healing spring. The spring will
restore all of your HP and MP, so you would be wise to fight quite a bit in the
surrounding screens level up a few times. There is even a moogle here so that
you can save while doing it. The letter you received earlier, from Kupo, should
be given to this moogle here. Deliver the letter, then build levels until you
reach level five.
Once you reach level five, return and refill your HP
and MP and save, then head to the right side of the screen. From here, walk to
the top, then walk to the top of the next screen, into the cave. Upon entering
the cave, you will see Princess Garnet and the plant brain.
Use Steiner's sword magic fire ability. A couple doses of this should kill the
monster, but before you do, make sure that you use Zidane to steal the iron
helm. If you need any healing, have Vivi administer potions. After several good
hits, Blank will join you. Use him to attack the plant brain with Zidane helping
after he steals the iron helm.
When the plant finally dies, Zidane will use Blank's medicine on Princess
Garnet, and she will begin to come around. When she does, you will be swarmed by
plant spiders. Run as fast as you can, and - after a few scrapes - Blank will
sacrifice himself for the party.
Once you are out of the forest, Steiner will make an idiot of himself. After he
does so, Monty, the moogle in the forest from earlier, will come out to you and
teach you several things about the game and give you the moogle's flute.
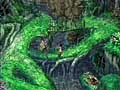
|

Skidmarks from Zidane sliding as he escaped the
Evil Forest. What is that in the background, though? Pride Rock from the
Lion King? |
Principle Character(s): Zidane, Vivi, Steiner, Dagger
At this point, the game will allow you to explore the Melda Plains a bit. Most
of the Melda Plains is rather empty, holding the entrance to the Ice Cavern and
the North Gate. While your goal is to head to the Ice Cavern, you will want to
check out the North Gate first.
When you arrive at the North Gate, a short dialogue will take place, and you
will then be free to explore it. You will want to walk through the fence to the
right and grab the potion and eye drops in the chests there.
|

While unnecessary, traveling to the North Gate
will allow you to visit a potion shop. |
Next, walk up to the gate and listen closely, then call out to the person
inside. After doing this, you will meet a medicine seller. You may wish to
purchase some potions from her, as they will assist you greatly in the Melda
Plains. Once you are done purchasing from her, head back, away from the North
Gate.
At this point, you will want to do some level building, as you will want Princes
Garnet to be at level five, at least, before heading to the Ice Cavern. During
this period, you will also gain a few abilities from the items you have
equipped, and this is very important. Order Zidane to steal and continue to
build your item stock as well, making it easier to heal your party while you do
so.
Principle Character(s): Zidane, Vivi, Steiner, Dagger
When Garnet reaches level five, she should also hopefully have learned heal. At
this point, head to the Ice Cavern and, after a short discussion between your
party members, they will head inside.
Once inside, grab the tent from the chest immediately in front of you, then jump
up to the next ledge and head to the top of the screen. On the next screen,
examine the wall on the right-hand side, and Vivi will then melt it, revealing a
chest containing ether. After grabbing that, grab the potion you find in the
next chest, then continue to the top of this screen.
On the top of this screen, you will find a chest containing an elixir behind a
meltable wall and a chest with a potion on the right. Grab them, then examine
the stalactite that you crossed to access the chest containing the potion. Vivi
will use his magic to push it to another chest, which contains the mage masher.
Equip the Zidane with the mage masher and continue to the upper right-hand side
of the screen to head onto the next. You will find a leather wrist if you melt
away the wall at the top of the screen, and there is a potion in a chest to the
right. Grab them, then continue to the next screen through the top of this one.
When you come to the V in your path, take the left branch first. This is
important because you will come to a moogle named Mois who you can thaw out, and
he'll give you another letter to deliver and allow you to save your game. Make
sure that Zidane is maxed out on his health as well, as the next major battle
will be a solo battle for him.
Once everything is ready, head back out and take the right path. Your party will
fall asleep, but Zidane will wake back up. When he does, head to the top-right
side of the screen to get to the next. On the next screen, you will face Black
Waltz No. 1, who immediately summons a sellion.
If you can, keep Zidane's HP above 120 by using potions. When possible, attack
the sellion, but otherwise, you will want to focus on waiting for your trance so
that you can use the tidal flame ability, which should all but kill sellion and
should kill the Black Waltz No. 1. If you can, steal the mythril dagger from the
sellion before you kill it, but if you are unable to, it is not a major loss.
After Zidane is victorious, he will return to his comrades, who are now waking
up. When everyone is on his or her feet, head back to where you defeated the
Black Waltz No. 1 and ascend the ramp. Head to the top of this screen, then out
of the cave on the next. Finally, you will overlook a town, and Princess Garnet
will choose the name by which she will be known for the rest of the game -
Dagger. She will also get a lesson in speaking like a peasant, much to Steiner's
dismay.
|

After all the nasty enemies, it'd be hard for the
way out to look any sweeter. |
Principle Character(s): Zidane, Dagger, Steiner, Vivi
If you are in need of potions, you may wish to stop off at the South Gate before
continuing on. To do this, speak to the guard at the gate and, after a while,
Worker Mary comes up to sell you them.
Otherwise, head to Observatory Mountain and grab the hi-potion near the bottom
of the screen and the 135 gil near the fence. After swiping both items, head
inside the hut and speak to the guy in there, then head out and to the bottom of
the screen to return to the world map.
Principle Character(s): Zidane, Dagger, Steiner, Vivi
Walk into the Village of Dali and you will immediately head into the inn. Much
to Steiner's dismay, Dagger ends up sleeping in the same room as everyone else.
When Zidane wakes up, grab the antidote from the chest in the lower right-hand
corner, then head out of the room. On your way, you'll get to see an Active Time
Event for both Vivi and Dagger, if you choose, and you'll also find a moogle,
who will let you save and to whom you may give the letter you picked up in the
Ice Cavern.
Upon leaving, you will see another Active Time Event, if you choose, of what is
going on in the inn. While watching it, however, you will discover that the
whole town appears to be watching you carefully and that there is something
about you that they are interested in.
To the left of you, there is an item and weapon shop with 120 gil above it.
Chances are, you have most of what they can sell you, but it may be good to get
more leather wrists to improve the armor of a few of your characters.
The next house up on your left is the mayor's house, but he is rather rude, so
you may wish to avoid him. In the next building on your left, you will be able
to grab an Aires Take it, but do not bother going up the ladder now, as you will
be unable to get anything while the windmill is turning.
Walk up to Vivi next and chat with him. After the chat, he will be kidnapped,
but Zidane will not see this. When you have control of Zidane again, walk back
to the weapon and armor shop to pick up Dagger as, by now, you have probably
seen an Active Time Event regarding her. If you have not then simply explore the
town a bit more until you do.
Return to the inn and talk to Dagger in your room. During the conversation, you
will be able to see an Active Time Event with Steiner in which he is told that
the adults do not return to the town until nightfall. After the Active Time
Event, control will return to Zidane. When it does, head out of the inn and up
to where you saw Vivi before.
When you get there, Zidane will find a hole, through which he looks to find Vivi.
After he does, walk into the windmill and head through the trap door in the
lower area of the room.
Walk down the ladder and take the elevator down. When you reach the bottom, open
the chest and take the 156 gil you find there, then head to the top of the
screen. On the next screen, you will see Vivi's captors, but before you can
rescue him, Dagger will pull you back and tell you that this place has some
connection to Castle Alexandria. After they are done, return to the screen that
you saw Vivi on and grab the potion from where they were holding him and the eye
drops from the chest below.
Next, continue to the right-hand side of the screen, and you will find a moogle
in a barrel. Talk to him and take the letter, then save your game and grab the
ether and potion from the two chests in this room (you can get to them by
jumping onto the boxes and then kicking the lever). Then head to the upper-right
section to advance to the next screen.
Take the leather wrist and iron helm from the chests in this room and, again,
continue to the upper right-hand side of the screen to advance. On this screen,
you will find Vivi in a box. Release him, and you should then see a door above
you. If you want to get a phoenix pinion so you can teach Dagger a new summon,
then open it, otherwise, do not. If you do, you will have to deal with random
encounters in this area, but it is well worth it.
Grab the phoenix down in the chest ahead of you, then head to the right, where
you will find two chests, one containing a potion and another containing a
phoenix pinion. When you are done, leave the area and open the chest near the
door, which contains 95 gil, then walk to the right side of the screen to
continue on to the next.
On the next screen, you will see conveyor belt that is powered by a chocobo on a
treadmill attempting to obtain gyshal greens. After checking it out, continue to
the top of the screen, and Vivi will react with abject horror. When some workers
walk in, Zidane, Dagger, and Vivi will end up getting boxed and rolling down the
conveyor belt.
Control will now shift to Steiner, who is on top of Observatory Mountain.
Follow the guy down the stairs and talk to the guy inside the hut there, then
head out and to the bottom of the screen, where you will see the airship.
Steiner will run toward the people loading the airship and spot one of the large
barrels. If you poke it with a sword, Zidane will jump out and start screaming
at Steiner. After everyone is out of the barrel, Black Waltz No. 2 will appear
and inform Dagger that the queen is waiting for her at the castle, and he will
then attempt to take her.
The Black Waltz No. 2 will not attack Dagger, so you won't need to worry about
her in the battle. When Vivi uses magic, he will provoke the Black Waltz No. 2
to attack him, which is something that you want to avoid. Because of this, use
Dagger to cast protect on the other three, and have Vivi use potions to heal.
Zidane should steal until you get the steepled hat and the leather plate, and
Steiner is quite effective with sword magic. Once Zidane finishes stealing both
items, order him to assist in the attack. The battle will be tedious, but it
shouldn't prove to be overly difficult.
When the option presents itself, you will want to stay at the inn to save and
rest, as you will have another boss fight soon. After staying at the inn, simply
return to the field and you will be able to board the airship.
|
The third Waltz... |
Principle Character(s): Zidane, Dagger, Steiner, Vivi
Once aboard the cargo airship, Vivi will panic when he sees the dolls moving
about yet not responding to him. Dagger will stay with him, and when she does,
have Zidane go up the ladder there, and you will see Steiner. Steiner will, as
usual, will act quite rude, and he'll block you from heading back down into the
engine room. When he does, simply head into the cabin and turn the cargo airship
around.
When the cargo airship is turned around, the Black Waltz No. 3 will head for the
ship. Eventually, the dolls will protect Vivi, but in an act that appears to
have an emotionally scarring effect on Vivi, the Black Waltz No. 3 shocks them,
dumping them all overboard. After this happens, Zidane, Steiner, and Vivi
confront the Black Waltz No. 3.
Order Zidane to steal the silver gloves and linen cuirass from Black Waltz No. 3
right off Afterward, he will probably end up being your healer, as he is not
very effective against the Black Waltz No. 3. Steiner should probably stick to
his sword magic, while Vivi should be used for casting offensive spells,
especially since he trances in the beginning. Overall, the battle should prove
to be quite easy - compared with the previous battle, at least. Instead of dying
at the end of the battle, though, the Black Waltz No. 3 will escape.
After the battle, the Black Waltz No. 3 flees, and Zorn and Thorn, the two court
jesters, flee from it. Back aboard the cargo airship, however, the party will
discover that the Black Waltz No. 3 is following them, and an extremely cool
scene will follow where the Black Waltz No. 3 ends up getting his airship blown
to bits.
|

Lindblum Grand Castle at last. |
Principle Character(s): Zidane, Dagger, Steiner, Freya, Vivi
Once you have disembarked from the ship, you will need to prove your identity.
This is easily done when Dagger's uncle, Artania, comes forth and escorts you to
see Cid. When Artania takes off, you will need to follow him manually, and
eventually you will come to Cid, who has been transformed into an oglop.
After a short discussion, Zidane will depart alone to look for some food after
complaining that the castle food is too high class for his tastes. Instead of
just finding food, however, Zidane ends up running across an old friend, Freya.
After meeting her, the game cuts to a scene featuring Dagger and Cid the
following morning.
Cid will reveal that he was the one who ordered Tantalus to kidnap Dagger, as
well as describe how he was turned into an oglop. After this, the focus shifts
back to Zidane and Vivi, who are chatting. Once the conversation is over, you
will have another Active Time Event, in which the moogles will teach you about
synthesis shops.
When you have finished watching the Active Time Event, walk out of the room and
into the next. Use the moogle here to save and have him read a letter to you.
Once you are finished with that, walk out of the room and through the door on
the far right.
Next, head out of the inn and you will get to see an Active Time Event for
Steiner. As usual, he acts like a completely confused idiot. After watching it,
however, head down into the street and up to the top of the screen.
On the next screen, walk into the door in the middle of the top of the screen.
Inside, you can grab an echo screen and a hi-potion. Take them, then head back
out, unless you want to have a card battle with someone who is very good.
Leave the screen via the top left street and walk through the door at the far
end, into the church. Once you are inside, climb the ladder and grab the leather
plate that you find there, then leave. After leaving, grab the tent under the
tree, then head back to the bottom of this screen and back to the previous one.
This time, head up to the top right street and look around. To the right is a
weapons and armor shop, and just to the left of that along the top is a medicine
shop. Purchase anything that you need, then head to the top left of the screen,
into the synthesis shop. While here, make sure to grab the silver gloves on the
left, and you may wish to look into purchasing a weapon here as well - they can
make some rather nice ones, and it is absolutely vital that you get the ogre.
After you are finally done shopping, head back to where the inn is and walk into
the room to the right. While your destination is the Theater District, you may
wish to head to the Industrial District first.
When you get off the cab, head up the stairs to the next screen, then head to
the bottom of this screen and grab the leather wrist there. Continue up the next
flight of stairs to the next screen, and on the left side, you will find a chest
that contains a bronze vest. After grabbing that, head through the door on the
far right, where you will find a mimic card and a steepled hat.
Once you have obtained these three items, head back to the cab and go to the
Theater District. From here, head to the bottom of the screen and, when you hit
the next screen, you will get to see an Active Time Event regarding Steiner. On
the bottom right, you can grab 127 gil, then head to the left-hand side of the
screen and down the steps there.
Walk into the first building on your left, and you will come to the Tantalus
playhouse. In there, you will get to see an Active Time Event about Dagger that
shows you where she is. After this, Bunce and Lucella will come in and tell you
that you should go see Dagger. Before you do, however, ransack the room,
grabbing the 68 gil, 282 gil, 97 gil, and the mini-burmecia. After you have
everything, leave the building and you will see another Active Time Event, this
time about Baku.
|

The Tantalus theater, Zidane's old hideout. |
Before you go for Dagger, head down the stairs here and talk to someone from the
crowd. Wait for the Moogle Man to emerge, then follow him up the stairs to the
top of the next screen. From here, walk into the building on the right-hand side
of the screen and open the chest you find there, which contains some ore. Next,
take the moogle suit from the right-hand side of the screen, and finally, talk
to Lowell for his autograph.
Finally, leave the building and enter the terminal. Then take an air cab to
Lindblum Castle, and after you arrive, head to the bottom of the screen. Head up
the stairs there, then to the right and down to the bottom of this screen. This
will take you into a room with a fountain. From here, head right, then into the
next door on the left, and you will find yourself in Dagger's quarters.
While Dagger is not there, Steiner is. After a poorly thought-out dialogue (but
what do you expect since Steiner tends to not think anyway), he rushes off in a
huff to search for Dagger. After he is gone, open the chest on the left side
that contains a glass armlet and the chest on the left side that contains ether.
Next, talk to the moogle to save, and then leave the room.
Head to the left side of the screen and, when you return to the lobby, you will
hear Dagger singing. Walk to the guard who is watching the elevator and talk to
him. When he denies you passage, head back to the right, then down the stairs to
the left and talk to the sleeping guard. Zidane will wake him, then take him
away and mug him, taking his clothes.
Return to the left and approach the guard watching the elevator again. When you
get in the lift, Zidane will automatically head to the appropriate floor. Head
to the left side of the screen, up the stairs, then to the left and up the
stairs in the next room. Finally, ascend the tower, and you will come to Dagger.
After talking for a second, Zidane will run up to the telescope. When your
view comes to a dialogue box with a question mark, hit the X button to identify
it. After you have identified six locations, the scene will shift back to Zidane
and Dagger. After a chat, you will see the beasts being released for the hunt.
When you come to everyone gathered in the room, they will talk about what
everyone wants, and each of the three hunters will declare his prize. everyone
has declared their prize, return to the air cab and head to the Theater
District.
Head to the left of the screen and kill the mu chasing the person here. Then
wait for the trick sparrow to attack you. After that battle, rush down the
stairs, past the next trick sparrow, and toward the barrels. Wait for the fang
to come at you. Next, rush back to the air cab and head for the Industrial
District. When you arrive, rush up the steps and kill the fang up there.
Head up the stairs and kill the mu on them, then on the next screen, kill the mu
next to the pub and the mu at the top of the screen. Finally, take a cab to the
Business District and run down the stairs at the top of the screen and kill the
trick sparrow there and the mu that leaps from the stairs on the right.
|
Qu's Marsh, you'll meet another friend here. |
Run up to the next screen and kill the fang on the left, then run to the
upper-right section of the screen, where you will see Zaghnol. Freya will assist
you with this one, so you will want to order both party members to attack the
Zaghnol. If you have any more time after the Zaghnol is dead, head down and to
the upper-left of the next screen. Take on the fang there, and you should
definitely run out of time.
If you were able to follow this exactly, then you will have 211 points at the
end of everything, winning the contest. After receiving your prizes, however,
the ceremony will be cut short by an announcement that black mages in steepled
hats are attacking Burmecia. After this announcement, the party gets prepared to
head out to thwart them, starting with a meal.
Dagger, however, has laced the meal with sleeping herbs. After everyone is
asleep, she rushes off. When everyone comes to, head out of the room, then down
to the bottom of the next two screens and ride the lift to the base level. Take
the right trolley to the Serpent's Gate first, grabbing the wyerd card from the
chest near the top of the screen, then continue on to the Dragon's Gate.
|
The Chocobo's Forest, a definite must-stop. |
Principle Character(s): Zidane, Freya, Quina, Vivi
Before you continue on to the Grotto, you will want to stop by Qu's Marsh. When
you get there, head up to get to the next screen, where you will see two
characters who should be very familiar. When you get to them, head to the top of
the screen yet again, and you will find yourself covered in grass. Walk to the
top of the screen one more time, and you will run straight into Quina. Get close
to one of the frogs and use the X button to capture it, then talk to Quina.
Quina will, more or less, end up getting kicked out of the area and will come
with you. Before you leave, however, you may wish to allow Quina to catch a few
frogs. As you catch them, Quale will come out to give you items that will assist
you later in battle.
Once you get out into the open with Quina, you will want to practice eating
various enemies. By doing this, you will get various blue magic spells that can
be quite useful and you may not be able to gain later in the game.
If you should decide to cross the bridge, you will come to a chocobo forest
right away. From here, you can play a hot-cold game, in which you may win
chocographs. With these, you can find some rather nice items that will give you
new abilities to learn. Further, you will come to the other end of the South
Gate. Here, if you walk across the branch, you can obtain mocha coffee and
refill your HP and MP from the stream flowing from the tree. It is wise to use
this as a level-building point, as you can increase quite a few levels in the
area around here.
Principle Character(s): Zidane, Quina, Freya, Vivi
When you are ready, head to Gizamaluke's Grotto and enter the caverns after the
short dialogue. Once inside, head to the right and talk to the wounded soldier
to obtain a Gizamaluke's Bell. When you have it, head back and to the top of the
screen and use the bell on the door to open the door.
Once the door has been opened, head forward and kill the two Type A mages that
attack you. After they fall, head inside and attack the next Type A that you
see, and you'll obtain another Gizamaluke's Bell from him
Next, walk up the stairs and use the bell on the left-hand door, then walk along
the walkway here. In the lower left-hand corner, you will find a chest
containing a bronze vest. Grab it, then talk to the wounded soldier at the end,
who will give you another bell.
Walk back to the door you just passed through, and then down the steps. This
time, walk through the door to the right and walk along the stairs, grabbing the
mythril gloves and magus hat as you pass by. When you reach the bell in the
center, you will see a moogle crying. Eventually, the moogle smells your kupo
nut and asks for it. Have Vivi give the moogle the nut, and the male moogle will
summon up enough strength to lift the bell and free itself.
When the moogle is free, walk up and open the chest to grab the Gizamaluke's
Bell, then walk through the door that the moogles passed into. In here, you will
be able to save your game, get more involved with mognet, and obtain the holy
bell, which you will need to open the next door.
Once you are ready, leave, and you will receive the holy bell. With it, walk
around to the lighter-colored door on the far side and walk through it, making
sure that your party is prepared for a nasty boss fight.
If Quina has eaten a serpion, then she will have the mighty guard ability. If
so, have her use it right away, as it will protect your group very well. Next,
have Zidane use soul blade to blind Gizamaluke. Afterward, you will want to
order him to steal until you have both the ice staff and the magus hat. Once
those are in your possession, allow him to attack Gisamaluke, as you will need
the help.
Freya should be resigned to using jump so that she is out of the mix, and Vivi
works out very well by using thunder, when not silenced, and assisting or
replacing Quina as your healer whenever absolutely necessary. After the fight,
everyone will move on and the screen will shift to Steiner.
|
Finally, the way out of Gizamaluke's Grotto. |
Principle Character(s): Steiner
Walk up to the guards, and they will ask to inspect your pack. After they do,
however, they will allow you inside. Upon entering, Steiner will look for a
place to open his sack, and he'll spot an alley. First, however, you will need
to move the two people next to it away.
Approach the woman on the right and console her, then talk to the young man and
answer him. After speaking with him, talk to the person on the far left of the
screen, but remember not to kill him. Then return and speak to the young man,
and he will leave.
When you approach the gate, Steiner will be stopped. The guard, fortunately,
gives him a gate pass after you speak with him. When you have the gate pass,
head for the alleyway, and Dagger will emerge.
Next, grab the potion from the chest and talk to the moogle to save your
progress. You will also want to prepare these two for a boss fight, as you will
have one very soon. When you are ready, walk up the stairs and talk to the man
here, then choose to depart.
Principle Character(s): Zidane, Quina, Freya, Vivi
The scene will now shift back to Zidane and company, with Freya attempting to
assist one of the wounded guards. After you emerge from Gizamaluke's Grotto,
head to the north gate, and Freya will begin to freak out at the signs of war
here. Once control is returned to you, go to the far end and grab the tend and
hi-potion in the chests there, then leave.
|

And here's the North Gate, exit of the Horse
Basin. |
Principle Character(s): Zidane, Quina, Freya, Vivi
Head into Burmecia now and, after a short dialogue, your characters will enter
the front gate. Next, head to the top of the screen, stopping by the cart to get
the Cancer, and, on the next screen, you will come to Zorn and Thorn, who will
call for black mages to come to their assistance.
Walk through the door on your right and grab the soft from the crate on the
right side of the room and the potion on the left side of the room. Finally,
leave the room and head to the right, up the stairs and through the door there.
Grab the soft from the chest behind the stairs here, and then head up through
the opening on the left. If you want to face a mimic, then you can approach the
"chest" there, but otherwise, you should ignore it.
When you walk onto the next balcony, it will fall. After it does, head back to
the room where you got both a soft and a potion, and you will find that you may
cross the upper balcony now. Again, ignore the "chest" on the
right-hand side and head through the opening on the right.
From this room, head out to the balcony, and Zidane will jump to the next room.
In here, you will find a wounded Burmecian soldier. After speaking with him,
head to the top of the bed and search under it to obtain the protection bell.
Once it is in your possession, grab the ether on the left-hand side of the
screen, then return to the outside, where you previously saw Zorn and Thorn.
Head back up the steps, then up the steps in the next room and through the
opening on the left. Next, walk up to the door and ring the bell to open it. A
couple of soldiers will pass by you as you head up, but ignore them and continue
up the stairs.
First, walk through the door directly in front of you and help the guards in
there. Afterward, Zidane will automatically exit, so take the stairs on your
right and head through the opening on your left. In here, you will find two
chests, one containing a phoenix down and another containing a tent. Grab these,
then continue forward and head through the door there, ignoring the next chest,
unless you want to face a mimic.
|
The entry to Burmecia. |
Head through the door on the left for Freya to obtain a mythril spear, then head
back out and go through the door on the right to grab a lightning staff for Vivi
and to see two moogles. The first, Stiltzkin, whom you've heard a lot about,
will have a soft, a hi-potion, and an ether for sale if you wish to purchase
them. If you do purchase them, Stiltzkin will continue his journey, and next
time he will have better items at better prices, so it is good to keep
purchasing from him for as long as you can so that you may get better items
later on. Atla, the other moogle, will also sell you items this time, in
addition to offering you mognet and the save feature.
After you are ready, save your game and leave the room, then head up the path.
Freya and Zidane will leap to the top here, leaving Vivi and Quina behind. Once
they reach the top, you will see Queen Brahne. After a bit of dialogue, a
Burmecian soldier will rush toward the queen. At this point, Zidane and Freya
will leap forward and urge the soldier to tend to the king instead. Fortunately,
Quina and Vivi will join you at this point as well.
Regardless of what you do here, Beatrix's actions will be the same, and she will
follow the same course throughout this battle. Because of this, you may wish to
just have Quina use mighty guard to protect your people, then have everyone heal
except Zidane, who you should order to steal from Beatrix. She has a mythril
sword and a chain plate, both of which will prove very helpful once you are
ready to equip them. When Beatrix is finally ready, she will use the stock break
ability, reducing everyone's HP to 1, and the battle will be over.
You will now need to save your game and flip discs. You're one-quarter of the
way through.
As with the previous disc, disc 2 is heavily scripted and you will not have much
freedom to explore where you please. Fortunately this will change dramatically
on the next disc, however. During disc 2 you will also meet up with the rest of
your party and face the final Black Waltz. It is important that you get to know
your characters well on this disc as later on you will need to decide who to
bring with you more often, and it is better to develop a few very strong party
members than keep everyone relatively equal for the end battles.
|
A map of the trolley station. As you can see,
you're practically there. |
Principle Character(s): Steiner, Dagger
When the car stops, exit and walk up either set of stairs to the right. Once you
arrive at the rest area, Steiner will leave you. After he does, talk to everyone
in the area, save your game, and deliver a letter to the moogle Nazna.
Next, grab the phoenix down from the chest in the lower right-hand corner, then
speak with the attendant. After you have spoken to the attendant, head out the
lower opening, and you will see Marcus and Cinna. When they are finished
speaking, head back inside and speak to either of them. Steiner will begin to
harass you, at which point you will need to speak to him to get him to be
silent.
Steiner will agree, but after he does, Cinna and Marcus will leave. Follow them,
then walk into the car and speak to everyone onboard and make sure that you have
yourself equipped to handle Black Waltz No. 3 again, as after speaking with
Marcus, he will attack you.
During this battle, you will want to have Marcus steal from the Black Waltz No.
3 until you've obtained the flame staff and lightning staff. If you want, you
can keep stealing until you get the steepled hat (unless you happen to get it
while going for the other two), but you should have quite a few by now. While
this is happening, you will want to have Steiner on the offensive, and you
should have Dagger heal your party and attack when she is able. If you keep it
up, this battle should pass by easily.
|
The exit of the South Gate, no need to go back... |
Principle Character(s): Steiner, Dagger
When the car stops, get out and stop by the item shop if you need anything,
otherwise simply head to the top of the screen. If you want to return to Dali
for some reason, then you can take the left, otherwise, head to the right to go
to Treno.
Jump across the bridge and then head down the steps to the bottom of the screen,
where you will find a chest containing 1,610 gil. Take this, then proceed to the
right-hand side of the screen. Show the guard here your gate pass, and then
continue onward until you find yourself on the overhead map.
Principle Character(s): Steiner, Dagger
Note: While walking the town of Treno, you will be able to view several
Action Time Events. You must view them, and it is best to view them in order.
When you get here, there will be a rather long dialogue, then everyone will
leave Steiner alone. After they are gone, walk to the fountain and drop money in
until you get the Gemini, then take off to the left side of the screen.
On the next screen, head to the far left and open the chest containing the
mythril dagger. After you have this, head back and go down the stairs to the
right of the screen. Walk forward here, and go toward the top of the screen,
heading through the door on the left. In here, you will be able to stop by the
local synth shop, as well as overhear a conversation regarding the town auction.
Once you are done, head out and to the top of the next screen, then up to see
the Queen of Treno. She will take the stellazzio that you have received so far
and give you items for them. At first they aren't too great, but they will get
better as you find more.
Continue on to the bottom of the next two screens, then to the right of the next
screen. Walk up the stairs on the right here to flush out the moogle, then talk
to it to have another mognet letter read to you. After that, continue through
the door on your right to come to the weapons and armor shop. If you like, you
may even fight the griffin here. While it is possible to beat it, it is very
difficult. You will get a tonberry card if you do, however.
Leave the shop, then continue to the upper left of the screen and grab the 2,225
gil you find there, then walk through the door to get Dagger back. After Dagger
is with you, leave and head to the right of the screen, then down and up the
flight of the stairs to the guy who is burping. From there, head to the lower
right-hand side of the screen to go onto the next one.
If you climb down the ladder on the right, you can pick up a yeti card and 1 gil.
There is also a Taurus stellazzio behind the item shop here that you will want
to grab. When you have these items, head back up the ladder.
When you are ready, head into the inn on the left side of the screen. Before
then, however, you may wish to return the Taurus stellazzio for some more gil or
a prize. Either way, it can be helpful before leaving.
Talk to Marcus when you are ready, and you will then have to run toward Baku, as
Steiner will be following you, trying to make you stop. When you finally reach
Baku, however, you will quickly find yourself onboard a boat and in a room with
a soft. Sadly enough, however, Dagger's old tutor crashes the party, but he
informs you that he will give you the supersoft, and everyone leaves.
Now return to the screen where you found the mythril dagger in the chest, and
you will find that you can enter the tower now. Head up the tower, then on to
the next screen. Talk to Dr. Tot, then talk to him again when you have control
of Dagger. When you have control a second time, however, and Dr. Tot opens the
door, do not head up, but instead leave his room and walk out of the tower and
view the ATE. After you have viewed it, head back up and into the door that Dr.
Tot opened up.
Principle Character(s): Dagger, Steiner
Before doing anything, you will probably want to talk to the moogle here, give
him his mail, and save your game. Next, head down the lower-left branch and grab
the chain mail from the chest to your right. Then move to the left side of the
screen, grab the phoenix down, and then flip the switch there.
Head back out, and this time go down the lower-right pathway, then head to the
top of the screen. Dr. Tot will come and tell you to pull the cord here. When
you do so, you will see the garagant. Once it is in view, head down and to the
left of the next screen and pull the "feed" lever. After you have
pulled it, you will automatically board the garagant, and Dr. Tot will assist
you in finding your way.
On the way, however, you will run afoul of a ralvurahva. The battle should prove
to be very easy, but you will want to make sure that Marcus steals the mythril
fork. When the battle is over, you will wind up captured by Zorn and Thorn, and
the focus will shift to Zidane and company.
Principle Character(s): Zidane, Freya, Vivi, Quina
The lay of the land will be the same as before, only this time you will be able
to enter Cleyra. Simply head to the sandstorm and enter.
Principle Character(s): Zidane, Freya, Vivi, Quina
Walk forward from the first screen, and on the next screen, pull the lever on
the right and walk through the door. Grab the phoenix down on the right of the
next screen, then continue to the top of the screen and you will come to a room
filled with sand. On the bottom left of this screen, grab the magician shoes,
then take the ice staff near the top.
Head out the right side of the screen, then walk up across the next screen and
grab the ether. After taking the ether, have Zidane put his hand into the hole
and he will flip the switch, filling the room below with sand. Once you have
done this, run back out of this room, then climb the vines outside the tree and
run inside the hole here.
Continue through the opening on the left, then grab the needle fork from the
chest to the left of the next screen and head up to take the tent. To the left
side of the screen is a moogle. Save your game here if you need to, and make
sure to give this moogle the letter you should have. After you are done,
continue to the top of the screen.
The left branch on this next screen will have a flame staff. Grab it, then head
back and take the right branch and you will come to a bridge. In the middle of
the next screen is a chest containing desert boots, and to your right is a
remedy. On the left side of the center opening, you can also find a mythril
vest, but you may have to look hard. Once you are done, continue down the center
chamber.
On your immediate left will be a chest containing mythril gloves. Grab these,
then continue forward and pull the lever. Head back down two screens now, then
take the left path and grab the potion on your right. If you continue up the
right branch here, you will come to an elixir that you may get if you like, but
otherwise take the left branch.
Across the top of this screen are two chests - one contains a hi-potion and the
other contains 900 gil. Grab both and avoid the sand traps. If you do get sucked
in, start smashing X as fast as you can and try to move Zidane out of it,
otherwise you will end up fighting a battle. If you can manage to get to the
other side, continue to the left, and then to the upper left of the next screen.
Finally, when you see the ladder, grab the gyshal greens behind it, then ascend
it and continue up the steps.
Principle Character(s): Zidane, Freya, Vivi, Quina
In the beginning of this section, Freya will be led off and Quina will go off on
her own to find "yum yums." Afterward, Kildea, a forest oracle, will
take you on a guided tour if you wish.
After the tour, if you chose to watch it, head to the right and take the 970 gil
from the chest here, then head back and up the first set of stairs. Grab the
phoenix pinion you find there, then head up the next flight and to the right. On
the right-hand side of the next screen, grab the ore, then head up the flight of
stairs at the top of the screen.
From here, you will see the Burmecian soldier Dan, and you may purchase weapons
and armor from him; you will probably want to purchase quite a few. After you
are done, head into the inn and take the 1,250 gil you'll find in the chest on
the right, then speak with Vivi. Sadly enough, Vivi cannot be helped, but above
him, you will find an echo screen. Grab this, then head upstairs and take the
ether next to the bed and speak to the moogle Mopli here to save your game and
pick up a letter.
|
The inn and the oh-so-precious moogle. |
Next, head out of the inn and up the stairs on the right, making sure to stop
and grab the remedy. On the next screen, head up the stairs as well, and you
will come to the temple. You will find gyshal greens as well as an echo screen
here. Take them and head inside, talking to the people along the way.
Inside, speak with both guards, and they will tell you that Freya wants you go
to the inn to meet her. Instead, head out of the temple and to the bottom of the
next screen. Continue to the lower left of the next screen, then down the next,
and you will come to where you entered Cleyra Settlement. Once here, head to the
bottom right, and you will come upon Quina. Speak with Quina, and she will head
into the "spiral" and you will follow her, allowing to get at two
chests that you were not able to reach before.
Open up the two chests to pick up a silk robe and magician shoes, then jump down
and head to the left-hand side of the screen. From here, head back to Cleyra
Settlement the way that you did before.
When you are back in Cleyra Settlement, head to the upper right of the first
screen, then to the top of the next one, and you will be near the inn. When you
get there, a Burmecian soldier will rush up, saying that the Antlion is mauling
a kid. Follow the Burmecian soldier to where Quina went down the spiral, and you
will find Vivi. A battle will then ensue.
You will want to have Zidane steal the gold helm, mythril vest, and anoyntment
that this beastie has during the beginning, then help your Quina heal your party
as is necessary. Quina should use mighty guard right away, and Vivi should use
blizzard. If you like, Freya can use Reis's wind or jump, which should hopefully
help her avoid the sandstorm attack. You should also use Zidane's soul blade
ability so that when the Antlion uses counter horn when you attack it, the
counter horn ability will miss quite often
After the battle, Vivi will run off, and Freya will head to see the King of
Burmecia. Next, Freya will attempt to assist in strengthening the sandstorm that
protects Cleyra, but instead the strings of the magic harp will snap, and the
sandstorm will dissipate. After it does, the scene will shift back to Steiner
and Marcus, hanging in a cage, and then to Dagger.
After a rather long display, the scene will shift back to Zidane and Freya.
When you finally have control of Freya, head left and grab the phoenix pinion,
then go to the top of the screen. Walk into the cathedral, then into the inner
chamber, where you will receive the emerald. There will also be a piece of ore
at the top of the screen and a phoenix pinion near the harp. Grab these and then
head to the inn, where you will find Stiltzkin. He will offer you three items;
purchase them, then speak to the other moogle to save your game. After you are
ready, head down to the entrance of town to meet with Zidane.
Head down the ladder, then to the right of the screen. Next, head to the lower
right of the next screen, and you will come to the sinkholes. Kill the
Alexandrian soldiers that attack you here, then head to the right and down the
next screen, killing the Alexandrian soldiers along the way, and down the
following screen as well, killing more Alexandrian soldiers.
When you get to the bridge, Freya will stop you long enough for Puck to come to
you, urging you back to the town. Everyone will rush back to the village just
before Beatrix gets on the scene, and you will see the black mages wreaking
havoc in the village.
|
Freya's lost love - too bad he has amnesia. |
Kill the black mage that attacks you right off, then head right and speak to the
moogles. Mopli will give you another letter here, and you should save your game,
as you will soon face Beatrix once again.
Next, head back and go up the stairs, where you will be attacked by Alexandrian
soldiers and two black mages. After the battle, Zidane will head up the stairs.
Tell the two people that you come to that they should head to the right if they
want to live. Next, head up the stairs and tell Burmecian soldier Dan's family
to go left.
Next, tell the family to head right, and then kill the Alexandrian soldiers that
assault you here. Zidane will then urge everyone into the cathedral to safety.
When he does, you will be attacked, but a stranger will save you.
Finally, after you find out that the stranger is Freya's lost love, Beatrix will
appear and steal the stone. The party will regroup, and Zidane will follow
Beatrix out. Speak to everyone out here to gather some items, and then speak
with the moogle to save your game. When you are ready, continue to follow
Beatrix out.
During this battle, you will want to order Zidane to steal from Beatrix until he
has the thunder gloves and ice brand. Quina should cast mighty guard, Freya
should use Reis's wind, and Vivi should cast slow on Beatrix. After this, you
should heal as needed and have Vivi use focus and thundara to take out over
1,000 HP per shot until Beatrix uses stock break to reduce everyone's HP to 1.
When this happens, the battle will end, and Beatrix will run away.
When Beatrix flees, everyone will follow her save Quina, who decides that he/she
does not like heights. Follow Beatrix, and you will overhear her with Brahne.
Afterward, head back, and when you get to the stairs, a moogle should appear.
Follow it and give it the letter you have, then obtain another from it. You can
also save here, which you will probably want to do. Afterward, head back to
where you started on the airship and use the pods to reach Alexandria.
Principle Character(s): Steiner, Dagger, Freya, Vivi, Zidane
Assist Marcus in swinging the cage until you are free. Two pairs of Alexandrian
soldiers will assault you on your way out, so dispatch them quickly and flee up
the ladder here and run to your left. Marcus will leave you at this point, but
fortunately Zidane, Freya, and Vivi will join you.
|

Swing it, swing it hard. |
You will now have 30 minutes to save the princess, which sounds like a lot, but
it's not because this includes talking time, etc. Also, each time you enter an
area, Alexandrian guards will run after you, so move fast.
First head down, then to your left, then up through the next two screens. From
here, head up the stairs and to the bottom of the screen, then up the flight of
stairs on your left. Walk through the double doors at the top of the screen
here, then head to the top of the next screen into the queen's chambers.
Walk to the top left corner of the room and move the candlestick, then head
through the fireplace here. The next room will have two chests - one contains a
tent while the other an ice brand. Grab them, then continue down the stairs for
two screens, then walk through the double doors at the top of the screen, where
you will find Zorn and Thorn.
These two will pass their magical power back and forth between them. It is
essential that you have two of your party members attacking at all times, while
Zidane steals the mythril armlet, the mythril armor, the paritsan, and the
stardust rod. After they have absorbed enough damage, they will run off. When
this happens, head to the top of the screen, and you will come to Dagger.
Head down the screen with Dagger and you will see the moogle Mosh. He will have
a letter that he reads to you, and you should then save your game and return to
the queen's chambers the way you came.
|
Again, the oh-so-precious moogle, the guy you
save with. |
Once you reach the queen's chambers, Zorn and Thorn will lead Beatrix to you.
Have Zidane steal her ice brand and survival vest, and make sure that Steiner
does nothing more than attack. With one of your previously obtained ice brands
equipped, he will pose a real threat to Beatrix. Vivi and Freya should use
phoenix downs as necessary, as there is little point in healing since Beatrix
takes your party members down in one hit most of the time and will drop you down
to 1 HP when she is finished with you, as usual.
After the battle, Zidane will show Beatrix to Dagger, and Beatrix will end up
siding with you when she sees her. Beatrix will then revive Dagger, much to Zorn
and Thorn's dismay. Brahne will then join you, and order Zorn and Thorn to
attack you. Beatrix and Freya hold them off, ordering Zidane, Dagger, Vivi, and
Steiner to flee while they still can.
Have Freya and Beatrix take care of the bandersnatch that Zorn and Thorn summon,
then the scene will shift to Zidane. Run down this screen, along the spiral
steps, and he will be assaulted by a group of black mages. After the bout,
continue down the stairs and kill the bandersnatches that attack you.
On the next screen, Steiner will rush back to assist Freya and Beatrix. When he
does this, the scene will shift back to Beatrix and Freya, with Steiner joining
them. Kill off the bandersnatches, and the scene will then shift back to Zidane
and crew.
Head into the chapel and speak to the moogle, saving your game and obtaining a
letter, then leave and head down the stairs on the next two screens. When you
reach the bottom of the stairs, you will find yourself trapped. Fortunately,
Marcus and Blank show up to save your crew. They knock down Zorn and Thorn, then
you pop away to an automatic ATE.
Principle Character(s): Zidane, Dagger, Vivi
Zidane, Dagger, and Vivi will now board a garagant and head out of Alexandria.
Along the way, however, you will be assaulted by a ralvuimago. Order Zidane to
steal the oak staff and adaman vest, then attack the ralvuimago until it coils
up. Vivi should use slow, and then thundara, while Dagger should heal your
party. It is important that you do not attack when it is coiled up, however, as
it will cause serious damage to your whole party.
When the battle is over, your party will reboard the garagant, and then continue
down the tunnel, chased by the ralvuimago. Instead of heading to Treno, however,
you end up crashing at Castle Rocks, near Lindblum.
|
The moogle, save here. Ramuh is to your left. |
Principle Character(s): Zidane, Dagger, Vivi
At the beginning of this sequence, you will meet Ramuh, and he will inform you
that to prove yourself worthy to him, you will need to find five of his
"ghosts" to learn his full story, at which point you may challenge
him. From here, you will automatically head to the next screen, but if you head
back, you will meet one of his ghosts who tells you the "hero"
portion.
Next, head back and to the left on the branch to learn the "beginning"
portion, then speak with the moogle here to deliver your letter and save your
game. If you like, this screen is an ideal place to level up for a bit, mostly
because Dagger will probably be well behind Zidane and Vivi and will need the
catching up since you will probably end up relying heavily upon her heal
ability.
When you are ready, head down the branch from the moogle, grab the mythril vest
from the chest at the bottom, and, on the right-hand side in the water, you'll
find a ghost who will teach you the "human" part of the story. Then go
up to the top, to the next screen, and you will come to another ghost next to a
chest who tells you the "cooperation" part. Then open the chest and
grab the ogre from it.
Walk up the branch here, across the bridge, and then down. You will come to a
point where you can jump off for a chest. Jump off, and you will be able to
remove a mythril armlet from the chest, then jump down from there, and you will
find another ghost who teaches you the "silence" part of the
story.Next, head back to where you jumped down for the mythril armlet, and you
will come to Ramuh. Speak with him and put the first three pieces of the story
in the following order: beginning, cooperation, silence. You may then choose
either human or hero, and you will receive peridot, which Dagger may equip to
learn to summon Ramuh.
|
Ramuh, come here after you have the five parts. |
Principle Character(s): Zidane, Dagger, Vivi
After a cutscene showing the destruction of Lindblum, head up to the next
screen. In the house in the center of the top of the screen are two chests. One
contains a phoenix pinion, and the other contains an ether. Grab them, then head
back out and grab the Lindblum card to the left of his house.
Continue to the upper-right of this screen, and minister Artania will take you
to see Regent Cid. He will give you 3000 gil and inform you of everything that
has been going on. After he is done, you will be returned to the Business
District.
First make a run through the shops here, making sure to stop by the synth shop
for a new weapon for Zidane. Then head to the inn and speak to the moogle. He
will have a letter for you from Ruby, and you should have a letter for him. He
will then give you a letter, and you will want to save your game.
Next, take off for the Theater District and head into the building on the right.
In here, you can get some ore, then leave and head down the stairs to the left.
Head into the old Tantalus theater, where you will find several chests. One
contains 262 gil, another holds 340 gil, and the third has 993 gil. Next, talk
to Lowell, and if you have read Ruby's letter, he will head off to find her.
Head back to the Business District now and speak with the person who is waiting
for you. First you will see another Active Time Event, then he will take you to
the castle. When you arrive, Zidane automatically heads down to rejoin Vivi.
Regent Cid will then join you and give you a world map, then he'll shoo you on
your way.
When you get off the trolley, speak to the moogle here and give him the letter
and save your game. Once you are ready to continue on, simply head out.
Principle Character(s): Zidane, Dagger, Vivi, Quina
Walk to the frog pond where you first met Quina, and - surprise - you'll find
her there again. After she separated from you, she headed directly back, so you
will once again have a fourth party member, which will be extremely helpful in
the coming battles. Hopefully Quina has already learned millionaire from the
yellow scarf, so you will be able to gain gil at a much faster pace again.
From here, head up one screen to Quale's hut, then leave to the right of this
screen. Quina will smell some frogs, and when she does, follow her and she will
lead you to the excavation site.
|

The entrance to Fossil Roo is here, really it
is... |
Principle Character(s): Zidane, Dagger, Vivi, Quina
Head to the right of the first screen, then to the right of the next one, on
which Armodullahan is let loose. Whatever you do, do not let this thing catch
you, as it is a fight not worth fighting. If it does catch you, however, just
run. You will want to leave to the lower right of the next three screens to get
away from it.
You will encounter Lani next. This fight should go pretty smoothly - have Zidane
steal gladius and the coral sword, and your other three party members can focus
on attacking and healing as you see fit. Lani will talk a big game, but when it
comes down to it, she is a real pushover so long as Vivi casts slow on her.
Next, head down the stairs at the top of the screen and up the stairs to your
left. Have Zidane pick one of the flowers here, then hold it up for the garagant.
After he comes to you, you will be able to ride him.
When the garagant drops you off, head through the opening in the upper right and
speak with the treasure hunter here. Next, after learning how the system of
levers and the garagant works, speak to the two moogles down the stairs to save
your game and purchase stuff.
Next, head down the lower right path here and pick some flowers, then hold them
up to call a garagant. When the garagant drops you off, head to the upper right
portion of the screen, through the cave, and grab the fairy earrings. Then head
back down, pluck the flowers, and call the garagant.
After the garagant drops you off, head to the left of the screen, then to the
top of the next screen, where you should pick some flowers and call the garagant.
When the garagant drops you off, head to the right, flip the switch, then
return, pick flowers, and call the garagant.
First take the upper path to grab the ether, then return and take the lower
path. Continue on the path straight ahead, and you will come to another switch.
Flip this, then return, pick flowers, and ride the garagant away.
When the garagant drops you off, flip the switch here and ride the garagant back
once again. On the next screen, walk to the left, to the bottom right, and ride
the garagant yet again.
Talk to the treasure hunter here if you want to purchase something, then walk up
the stairs, flip the switch, and head to the right side of the screen to call
the garagant. After it drops you off, head to the right to get a Lamina's tiara,
then return and summon the garagant to continue on your journey.
After the garagant drops you off, head left again, flip the switch, then return
and summon the garagant. Next, head to the left and you will see a wall of
vines. Climb onto it, then head directly to the right. You should get knocked
down; when you do, walk up to the platform and climb back up the vines to the
edge on the upper right.
Walk to the right and speak with the treasure hunter here. He will let you dig
for the price of a potion, so give him the potion and dig against the wall on
the right to free the moogle Kuppo. If you wish, you may purchase stuff from
him, but be sure to save your game. After you are done, dig around in this
chamber to uncover several goodies. You will need to whack an area several times
to find anything. When you are done, tell the treasure hunter, then walk down
the lower right path.
In the far left of this chamber, you can pick up a survival vest. After you have
it, leave and return to the room with the vine wall. This time, climb straight
up, then move across the top to the upper-left platform and flip the switch.
Next, head to the bottom of the screen and exit via the bottom right passage. On
the next screen, summon the garagant and walk to the right to head for the Outer
Continent.
Principle Character(s): Zidane, Dagger, Quina, Vivi
This section will prove to be very brief, but it will have two monsters that you
will want to have Quina eat, if she has not already. The first is the griffin,
which you have had a chance with before, and the other is the cactaur. It is
imperative that you have Quina eat both of them.
Next, simply head straight for Conde Petie and enter.
Principle Character(s): Zidane, Dagger, Quina, Vivi
At the beginning, you will have to say "rally-ho" to the dwarves to
gain entrance. Afterward, everyone will abandon you. When they do, walk up a bit
and take the 2700 gil, then head inside. You will be presented with several ATEs,
and you should watch them all.
|
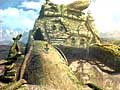
Here we are at Cone Petie. |
If you head two screens to the left from the entrance, you will find your way to
the inn. Stay there if you like, then make sure that you head one screen to the
right, then up the stairs, and to the lower right of the next screen, where you
will see one of the black mages. Zidane will chase it and end up where you
entered the town.
From here, head two screens to the right and you will come to an item shop and a
moogle. The moogle will give you a letter, so make sure that you get that, then
head to the upper right to get to the weapon shop. Once you are done purchasing,
head back to the entrance and leave, as you now need to head off to the Black
Mage's Village.
Principle Character(s): Zidane, Dagger, Quina, Vivi
Look to the southeast, and you will see a green bulge in the foliage. Walk
around the mountainous area until you reach it and hit the X button to get in.
It really should not take you too long.
Principle Character(s): Zidane, Dagger, Quina, Vivi
Once in the forest, you will see a signpost. Walk up to it, read it, and head in
the direction where there are no owls. This will take quite a bit of time, and
the screen will always be the same. Time and time again, run up to the signpost
and head in the direction where there are no owls, even if you head the same
direction multiple times or if you go down the same path you came from - even
though it looks as if you aren't making any progress, you are.
After about seven screens, you will see the black mage, and will finally be able
to enter the village. Inside the village, however, everyone will abandon Zidane
and you will be on your own. Simply watch the ATEs, though, and you will be able
to keep track of them.
|

The entrance to the Black Mage Village is
closing... |
To the left of you is a hut with an elixer outside and a weapons and armor shop
inside. Stop by if you want to pick up anything. On the screen to the right, you
will find a moogle who has a letter for you. Take the letter and save your game,
then head inside the hut. To your right are some gyshal greens - grab them and
ignore Quina, she is just interested in eating the chocobo egg that the black
mages have.
Next, head back to where you came in and walk up the steps in front of you, then
run around the building to the right and cross the bridge. Here is the inn, and
while the black mages won't let you stay here, you can get the Virgo from a
chest on the right-hand side.
Next, leave and head into the door of the shop you find. Finally, you will be
able to grab some hi-potions, so you will probably want to stock up. When you
are done, leave through the lower door and continue to the left, heading into
the next hut to see Dagger. She will again run off in search of Vivi, but you
can grab the 2000 gil here and use the synth shop, which can make some great
items. When you are ready, head up the ladder and you will be able to snag 843
gil on the roof.
Head further to the left, and you will see Vivi run past you. Speak to the black
mages here, and then head back to find Vivi. Vivi will be hiding in the inn, and
Zidane will cover for him to the group. Call it a night when you are ready, then
after much goings-on in the morning, you may leave and return to Conde Petie
Principle Character(s): Zidane, Dagger, Quina, Vivi, Eiko
Something happens during this visit that few would expect. Yes, that is right,
Zidane and Dagger get married. Anyway, when you are ready to see this,
head back to Conde Petie and speak to the second dwarf back in the room you
started in. She will explain that you need to undergo the ceremony.
Next, head left and walk up the steps, then speak to the dwarves on the
upper-right end of the screen. After speaking with them, head back down the
steps and speak to the dwarf there. Dagger walks in and agrees immediately to
the marriage, to Zidane's complete amazement.
After Dagger and Zidane's marriage, you can, of all things, have Vivi and Quina
get married. Once that is finished, Eiko will run past Zidane and Dagger while
they pass the guards, and you are then joined by Vivi and Quina.
Principle Character(s): Zidane, Dagger, Quina, Vivi, Eiko
When the ceremony is finished, simply head to the lower-right portion of the
screen, where you will see Eiko and a moogle. After a bit of dialogue, Quina
will run off and Eiko will join your party. When she does, head to the top of
the screen, climb the vine there, and take the remedy from the chest. Next, head
right and pull the blue stone from the statue, then return and climb down the
vine. Then continue to the right of the screen.
Climb up the vine there and head to the left for a tent, then grab the red stone
from the statue. Afterward, return and climb down the vine, then continue on
down the path to the right. Next, you will come to everyone's favorite moogle,
Stiltzkin, who is accompanied by Suzuna. Deliver your mail here and save your
game, then continue down the path to the lower left, climb the ladder, and head
to the right across the branch.
Prepare your party for battle now, and then continue to the right, where a giant
will assault you. Have Zidane steal the fairy flute if you can, and have Dagger
summon Ramuh while Vivi uses bio. Eiko should heal or attack, depending upon if
your party needs the healing. All in all, this should prove to be an easy battle
- stealing the fairy flute before you killing the giant will prove to be the
real challenge, though.
Next, continue to the right, then take the lower path. Take the ether from the
chest you find there and the green stone from the statue. Head left two screens
and take the yellow stone from the statue here, then return down to the lower
left of this screen and back to where the moogles are. When you get back to
them, take the lower-right path this time.
Put the four stones you have into the statue here, and you will receive a
moonstone. Once you have this, return to the place where you found the yellow
stone.
Take a right here, and then continue on the upper branch and to the upper right
of the next screen. After your journey is over, you will be on the overland area
again. Directly in front of you is Eiko's village.
|
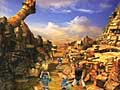
The entrance to Madain Sari. |
Principle Character(s): Zidane, Dagger, Eiko, Vivi, Quina
Upon arriving here, everyone will split up and go their separate ways. When they
do, look at the fountain to pick up the Libra. If you head to the upper right,
you will come to a restricted zone, where Quina is. Say hello to her, then head
back down and to the left.
Here you will see Vivi. Talk to him, then try to head into the building.
Morrison will stop you, but he will take you to the eidolon wall. Follow
Morrison and watch the ATEs as you go, and eventually you will be there.
About this time, you should see an ATE with Eiko wondering how many to cook for.
Despite what she says, the actual number is 11. Next, do not put the oglop in -
it disagrees with a few people. Also, when Quina shows up, you will want to let
her assist Eiko, as she is a gourmand.
When you get to the summoning wall, Zidane will remember that Dagger can
summon, and he'll say that he's going to fetch her. To find her, head to the
lower left, then to the lower right, and she will be standing there. Talk to
her, then return to Morrison.
After there isn't anything more that you can say to Dagger or Morrison, return
to Eiko's house. During the meal, Eiko reveals more about herself, and she
eventually asks Zidane to grab the pot and bring it into the kitchen. When she
does, first open the two chests to grab a phoenix pinion and some ore, then take
the pot into the kitchen.
After control is returned to Zidane, grab the kirman coffee next to the picnic
table, then resume speaking with Eiko. When she starts to repeat herself, walk
back inside the house and try to leave. Morrison enters, take him up on his
offer to stay the night.
In the morning, Eiko will rejoin Zidane, Dagger, and Vivi and head for the Iifa
Tree. Quina, on the other hand, will stay behind. Simply return to where you
found the yellow stone and take the branch that leads to the top of the screen.
Finally, walk straight ahead to the giant tree on the overhead map, and you are
there.
|

The entrance to the Iifa Tee, note the mist. |
Principle Character(s): Zidane, Dagger, Vivi, Eiko
When you get there, ask Eiko to try to break the seal, and she will do so with
ease and then receive a ruby for her trouble. This should allow her to summon
carbunkle, giving her a third summon.
On the first screen, simply head forward. You will encounter a lot of undead
creatures here, and when you do, cast life or cura/cure on them to either kill
them or hurt them badly.
For the next five screens, simply head straight along the branch until you come
to a moogle. When you do, save your game and give him the letter you have. When
you are done, continue down to the next screen and have Zidane stand in the
middle to ride down through the trunk of the tree.
Simply head down the root to the next screen, and you will come to two offshoots
to the right. On the second one, you will find a lever that drops a chest down.
Grab the phoenix down you find in the chest, then continue until come to another
offshoot, which has a chest containing a hi-potion. Grab the potion and continue
on your way.
|

The mist is finally receding. |
Along the path here, to the right, you will find an ether. Grab it and continue
down and take the left path. There are two chests here - one contains a remedy,
and the other contains a Lamia's flute. Grab them, then head back down the
branch you haven't taken yet to the next screen, where your party will come to
an unusual elevator.
After some dialogue and a couple of battles, you will reach the bottom. Upon
reaching the bottom, descend both flights of stairs and pick up the elixer here,
then head to the other end of the column and pick up the brigandine.
Finally, walk to the far-left side of the screen and examine the moving thing
there to trigger a boss fight. Simply run up to Dagger, then the battle will
begin.
During this battle, have Zidane steal the oak staff, magician cloak, and
brigandine from the boss, then proceed to attack. Eiko should act as your
healer, summoning phoenix when someone dies, while Vivi should cast bio (as
fire-based attacks really set this thing off) and Dagger should summon Ramuh.
After a short while, this battle will be over and the party will have to flee.
After some dialogue, Eiko will get some disturbing news. Because you should now
be familiar with the way, simply head back to Madain Sari.
Principle Character(s): Zidane, Vivi, Dagger, Eiko, Amarant
When you are ready for a boss fight, head into Madain Sari, and immediately Eiko
will go running off. When she does, follow her, then head to the left of the
next screen and into her house. Walk into the far room and then out onto the
patio and into the lower room of her house, where you will find Eiko.
After a lot of dialogue, Eiko runs off and Vivi bursts in, saying that the girl
from Fossil Roo is back. When this happens, open the chest here to pick up
another survival vest, then grab the phoenix down and head out to the eidolon
wall.
Upon arriving, speak with Morrison and he will heal you and let you peek inside.
Another moogle will also give you an exploda and some elixirTake these, then -
when you are ready - head inside.
Instead of fighting with Lani, however, Amarant drops in and gets rid of her,
challenging Zidane to a one-on-one fight. Zidane naturally accepts, and the
battle ensues.
If you have been leveling up enough, then you should be around 1,250 HP or more,
and this will be an easy battle. Otherwise, you will definitely want to be using
auto-potion. Make sure, however, that you have the counterattack ability turned
on, if you have it, as this fight will then be over very fast. Don't
worry about stealing during this fight, either - besides an ether, he only has
poison knuckles, and you should already have a set or two of those.
After the fight, head back to the room under Eiko's house, and you will find
Eiko and Vivi. When the conversation is over, everyone will abandon Zidane
again. Once this happens, walk out of the house and, when you see an exclamation
point over Zidane's head, you will be able to listen to Dagger singing.
A long cutscene will now ensue, and at the end, Dagger remembers her past, as a
member of the lost tribe of summoners. When it is all over, everyone will
congregate in front of Madain Sari, and Amarant will join you, forcing you to
decide who will come along with you.
If you have noticed, having two healers in the party can be a bit troublesome,
because you lack the physical power that you need. Because of this, I suggest
taking Vivi and Amarant, and then either Dagger or Eiko. Personally, I chose
Eiko, but that is largely because she had some more leveling up to do and her
phoenix summon is more useful than Ramuh. You may, of course, opt to pick Dagger
if you like. If, on the other hand, two healers is more useful for you, then go
for that and drop either Vivi or Amarant.
When all is said and done, however, return to the Iifa Tree to meet up with Kuja.
|
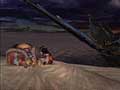
The death of Brahne. |
Principle Character(s): Zidane, Dagger, Amarant, Vivi, Eiko
After watching Kuja fly overhead, head forward and walk along the branches for
about three screens, at which point Zidane decides to climb up the trunk. While
Zidane is trying to figure out how to do so, Amarant steps in and grabs Vivi and
Eiko and begins his ascent. Zidane follows suit, taking Dagger with him on his
back.
You will have one more chance to change your party around, but there really
shouldn't be any reason to. When you are ready, head up, and there will be a
rather long dialogue between your characters and Kuja that gets interrupted by
Brahne. Despite this, however, Dagger ends up making an attempt to gain a new
eidolon.When she runs off, save your game and read the letter from the moogle at
the top of the screen. Then continue down the screen, running as fast as you can
for several screens.
Once Zidane is free, you will see a series of completely incredible cutscenes
that include the summoning of Bahamut and the death of Brahne. Naturally, this
is also the end of Disc 2, so save your game and swap out the discs.
Disc 3 delivers the much needed freedom to explore that you have not had on
either of the previous two discs. Your freedom will not come in one big dose,
however. Instead you will first gain the use of a regular ship, then later in
the disc an airship. When you receive the airship it is important to wrap up a
good number of the side quests as several of them will be off limits once you
reach disc 4.
Principle Character(s): Dagger, Steiner, Zidane
After returning to Alexandria, Dagger is once again treated like a porcelain
doll, and everyone comes to the realization that she is now, or will be soon,
the queen of Alexandria. After the party pulls up on the boat, however, the
scene then shifts from Dagger to Zidane, and Zidane is teased for having
apparently "lost" Dagger. Afterward, Ruby brings everyone over to her
theater and invites Zidane, should he ever choose to stop by.
Afterward, when everyone leaves with Ruby, Vivi walks by, and control shifts to
him. When it does, have Vivi head to the right and speak with the hippo on the
left side of the screen. She will ask you to race her child for exercise, and by
doing this, you can get some pretty cool items. If you decide to race, you will
want to do so until you have obtained the athlete queen, which may take up to 80
tries. If you want, give it a try, but it is very difficult, so you may wish to
pass.
Next, head back, and continue further to the left. If you wish to stop by the
item shop, then head into the building on the right here, otherwise, continue
forward. To your right on this screen is the synth shop, as well as the weapons
and armor shop. They have some new items, so be sure to stop by.
On the left-hand side is the inn, but there isn't anything you can do there, as
one of the customers is making a scene. Instead, head into the alley on your
left, and you will come to Blank and Marcus. Ignore them for now and continue to
the next screen.
Walk into the first house on the left and you can get some eye drops from a
chest. After you have obtained them, head out and into the next building on the
left. Talk to the moogles here, deliver your letter and hear another. Next, head
up the tower and pull the rope to receive an ironite card, a goblin card, a fang
card, a shiva card, and a Ramuh card.
Now that you have the important cards, head back to Blank and Marcus and go to
the play. Head down the stairs and Ruby will get started, but before she
actually does, the scene will shift to Dagger and Steiner with Dr. Tot and
Beatrix. Dr. Tot will give you an opal, topaz, and amethyst to assist you as
well.
The scene will next shift to Eiko, who urges Dr. Tot to assist her in authoring
a love letter for Zidane. Dr. Tot takes special note of Eiko's horn during this
period as well, remembering how Dagger once had a horn. Once Eiko is done with
the letter, she informs Dr. Tot where she is from, then runs out of the room.
If you want to save your game, simply run back into the room and speak with the
moogle there. Otherwise, head to the top of the screen, and Eiko will end up
giving the letter to Baku for delivery to Zidane. Sadly enough, Baku drops the
letter in the next scene during a verbal fight with Steiner. Beatrix picks up
the letter and thinks that Steiner dropped the letter.
Again the scene will shift back to Zidane, who is joined by Vivi, who has just
been hassled by Tantalus. When you control Zidane, head to Ruby's theater to
grab the 2680 gil by the first table, then head back out.
Walk to the square, then to the top of the screen, where you will see Freya and
Amarant. The two begin to square off, but Zidane steps in and breaks them up,
and they join him. You have four people in your party again.
Grab the phoenix pinion and the 3,927 gil laying on the right- and left-hand
steps, then take the ferry across the moat. Upon disembarking, grab the lapis
lazuli from behind the fountain, then head to the top of the screen, where you
will see Steiner. After an exchange, Vivi steps forth and Steiner agrees to let
you see Dagger, as it is Vivi's wish.
In the following scene, you will see what became of the letter and watch some
interesting moments between Steiner and Beatrix. After the scene is finished,
Eiko, Vivi, Zidane, Freya, and Amarant head off to Dr. Tot's in Treno.
Principle Character(s): Zidane, Vivi, Freya, Amarant, Eiko
Naturally, upon arrival, everyone will vacate, leaving Zidane alone. You will
also get the opportunity to view some important ATEs, so keep up on those to
follow the story along. In the ATE with Vivi, you will want to have him head
home, as this will benefit you greatly.
Since you are probably familiar with Treno still, I won't bore you with an
overly detailed section here. Make sure that you stop by and turn in your
stellazzio, as well as fight the monster and stop by the auction.
At the auction, there are four items in particular that you want to obtain. The
first three are to resell, and the fourth is for Dagger. Une's mirror will
resell for 15,000 to someone near the café, Doga's artifact will resell for
10,000 to the researcher in the synth shop, and the rat tail will resell for
25,000 to someone near the café. While you may get the griffin's heart to
resell, it is possible to get stuck with it, so I'd suggest not going for it.
These items can only be resold once. The one item for Dagger is the dark matter,
which allows her to summon Odin. This can cost near 25K, but it is easily worth
the price.
|
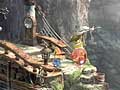
Vivi remembering being pulled from the mist by
Quan. |
Once you are ready to head for the card tournament, save your game with the
moogle outside the weapon shop, then head on over, register, and walk in. After
you win the first round, watch the Good Old Days ATE and order Freya to say
"No, I won't force it out of you." You may wish to choose the other
option, but reload if you do want to hear it, though. Next, return to the moogle,
viewing Home Sweet Home along the way, and save your game.
Since you have viewed the Home Sweet Home ATE, you should leave Treno and head
to Quan's dwelling to pick up Vivi. If he didn't go there, then you would not
have an opportunity to get the coffee, and you would not have Vivi for your
coffee quest if you didn't stop by here first, so this part of the quest is
quite beneficial.
Run forward and open the chest on the right to obtain the ether, then head to
the left and climb down the rope. Take the Scorpio from the bottom of the wall
near the chest there, then open the chest for another ether. Head back up the
rope and through the tunnel on the right. Climb the ladder here for an ether,
then leave and head through the South Gate.
While this will take a while, you will be rewarded with not just the coffee, but
also large amount of gil.
Once you reach the South Gate, go through it, head to Dali, and go into the
windmill. Because the windmill has stopped, you can open the chest containing a
cachusha and the chest containing an elixer.
Next, head back down, then to the bottom of the mill to enter the mayor's house.
Search the desk three times, then the heater to obtain the mayor's key. Return
to the windmill and use the mayor's key on the door here. Take the 30,000 gil
from the chest, then search it again and you will find some burman coffee under
the chest. Grab the coffee, then head to Observatory Mountain and give the man
his coffee.
When you are done, return to Treno and save your game, then compete in the
second tournament. After this round, head up to where the moogle is, but instead
of saving, continue to the next screen and get Freya to join you. Once you are
ready, go and save, then compete in the last round of the tournament. If you
lose, it is worth restarting.
For winning the tournament, you will receive the rebirth ring, which will teach
a good number of your characters the most important ability they can learn -
auto-life. Sadly enough, however, Eiko then runs in and informs you that
Alexandria is under fire from Bahamut.
Principle Character(s): Zidane, Quina, Freya, Amarant, Vivi, Eiko,
Dagger, Steiner
Order Blutzen and Kohel to gather information, then Weimar and Haagen to protect
the townspeople. Have Breireicht and Laudo contact Lindblum and request
reinforcements, and finally, have Mullenkedheim and Dojebon prepare to fire the
cannons. For your hard work, you will receive angel earrings.
The scene will then shift to Beatrix and Steiner. They will be attacking several
mistodons here, and because they are undead, Beatrix's life spell will kill them
instantly, which means Steiner works better in a healer's role. Attack the first
mistodon, then head to the bottom of the screen, where you will come across
another. Continue down this screen, and you will come to a pair of mistodons.
On the next screen, you will have four mistodon battles. The first three consist
of only one mistodon, and in the last, you will face two. After this, the scene
will shift back to Dagger.
Have Dagger head up the stairs and through the doors at the bottom of the
screen. Next, walk up the stairs and through the double doors up top, then
through the door on the left. Climb the stairs here, and the Castle will
automatically transform, giving Dagger another stairway to climb.
Ascend the stairway here, as well as on the next screen. Continue up the stairs
until you reach the top, then walk to the far end and, after a short dialogue,
the scene will shift back to Zidane, Amarant, Freya, Vivi, and Eiko.
Eiko will then jump from the airship that everyone is riding and go to Dagger.
Eiko and Dagger will summon Alexander, who defends Alexandria against Bahamut
and defeats him. Kuja then appears and orders Invincible to capture Alexander,
yet someone new, Garland, steps onto the scene and stays Invincible's hand, much
to Kuja's dismay.
Next, Zidane, Vivi, Amarant, and Freya, accompanied by Cid, rush into the
castle. Head up to the second floor and save your game, then return to the first
floor and head to the left to fight Tantarian, an optional but worthy boss.
Tantarian is an interesting boss, and it is very difficult. You will want
everyone in your party to have auto-potion turned on, as you do not have a
healer. Have Amarant use his spare change ability, which will force this monster
to show its true form. Zidane should steal until you have the demon's mail and
the silver fork, but he shouldn't attack, as physical damage will force the
monster to revert to its previous form. Vivi should be casting constantly, and
the rest of your party should either use abilities or heal.
After the battle, your party will receive a good amount of experience and a set
of running shoes, as well as 30 AP, making the battle well worth the
effort. When the battle is over, however, simply follow Dagger to the top of the
castle and watch the following cutscenes.
|
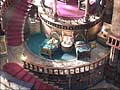
Zidane comes to. |
Principle Character(s): Zidane, Quina, Freya, Amarant, Vivi, Eiko,
Dagger, Steiner
Begin by pilfering the chests here to obtain an egoist's armlet and an elixer,
and then talk to the moogle to save your game. When you try to leave, Blank will
run up. Ask him about Dagger, and - after being answered - Zidane will rush out
of the room.
Head to the left here, then to the elevator, and ride the elevator to the top
floor. Continue to the left until you reach the telescope, and Zidane will go to
Dagger. Head back down after speaking with Dagger and you will run back into
Blank, who tells you to see Regent Cid.
Head to the top of the screen, then through the door at the top of the next
screen to see Cid. Cid will take you down to the conference hall, and a rather
long bit of dialogue will take place, with the focus shifting back and forth
several times between a couple of parties. During it, however, you will learn
that Dagger has lost her voice, and that Kuja has an airship.
When control comes back to Zidane, head out and down to the middle level,
then to the upper right and through the door in the top of the screen there.
After seeing Dagger's condition, Zidane has Eiko baby-sit Dagger and Steiner,
then everyone else returns to the throne room, where Zidane is determined to
find a cure for Regent Cid's condition.
Dr. Tot will mention that you need three ingredients - unusual potion, beautiful
potion, and strange potion - mixed in a 5:2:3 ratio. To get these, head to the
artist's house in the Theater District, where you will find the strange potion
and a lapis lazuli.
Leave and head to the Tantalus theater to get the unusual potion from Cinna,
then return and search the theater for the 1,217 gil, 4,826 gil, and 970 Gil
found in various chests, as well as the mini-prima vista from Morrid.
Next, head to the Business District and walk to the top of the screen. In the
open area on your left, you can grab the Sagittarius. Then head to where the
shops are and stop by the synthesis shop. If you have the necessary items, you
can get a cool new weapon for Zidane, as well as some other items. The weapon
and armor shop also has some good stuff. When you are ready, speak to Alice at
the item shop, and she will give you the beautiful potion.
Return to Regent Cid, and Dr. Tot will apply the potions. Instead of returning
him to human form, however, they turn him into a frog. After some dialogue, Cid
will announce that he has a ship you can use. Head to the base level and ride to
the Serpent's Gate. Upon arriving, grab the chimera armlet from the top, then
walk to the bottom of the screen.
Continue down to the bottom of the screen, and you will come to the ship. Hop
onboard and get your party situated, then head out for the beach next to the
Black Mage Village, and walk over to it.
|
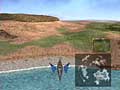
Land here to get to the Black Mage Village. |
Principle Character(s): Zidane, Quina, Freya, Amarant, Vivi, Eiko,
Dagger, Steiner
Immediately, Vivi will run off. Don't chase him right away; instead, go to the
item shop and climb the ladder, then get on the bed to obtain a black belt.
Afterward, head to the cemetery to find Vivi and one of the other black mages.
Speak with him, then he will indicate that two other black mages are in the
chocobo shack, and again Vivi will take off.
Follow Vivi to the chocobo shack and, after some dialogue, you will discover
where Kuja is hiding out. To get there, head back to your ship and go to the
eastern side of the continent, and walk up to the northmost sinkhole. Avoid the
others, as they will lead you into combat with anAntlion, and they are very
strong here and don't give you enough experience points to be worth it. If you
do want to gain levels, however, walk around here and fight the land worms, as
you will be able to level up quickly by fighting them.
|
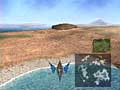
Land here to reach the quicksand. |
Principle Character(s): Zidane, Quina, Freya, Amarant
Upon entering Kuja's base, your entire party will be knocked unconscious, and
Zidane will wake up next to Regent Cid. Kuja will interrupt and make an offer to
Zidane that you have no choice but to accept. After accepting, Zidane will step
outside and walk down to two black mages. When Zidane steps between them, they
will transport him to see Kuja.
Kuja explains that he wants to send you to the Forgotten Continent so you can
obtain the gulug stone. The reason that Kuja doesn't go there himself is because
there is an anti-magic barrier around it, and, naturally, that disagrees with
Kuja's preferred form of attack. You will also get to choose a party to go with
you, but remember that whoever you don't choose will form a second party.
Because of this, you will probably want to take Freya, Amarant, and Quina, as
Steiner will be of more help to the second party when paired with Vivi, and
Quina can eat some nice enemies on the Forgotten Continent.
The principle characters lists of the following scenes will reflect this
selection. If you happened to choose a different party, then they will naturally
be different, so keep that in mind.
Run around and onto the Hilda Garde 1, and it will automatically take you to the
Forgotten Continent. After disembarking, make sure to try to reboard the ship so
that you can purchase medicine. You will also want to turn on the auto-potion
ability for everyone, since you will not have any healers in your party.
Principle Character(s): Zidane, Quina, Freya, Amarant
Begin by heading north so that you can catch some frogs for Quina. Fortunately,
they are quite easy to catch here, so this shouldn't take long. When you are
done, head back to the airship, then continue to the south through the canyon.
Eventually, you will be able to turn to either the east or the west - left or
right. Opt to head to the west, or right, and walk a little way, then turn south
again. Take the next branch to the west, then head south into the spiral canyon
next to the water, and you will eventually find Oeilvert.
|
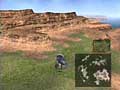
Return here when you need potions. |
Principle Character(s): Zidane, Quina, Freya, Amarant
Begin by speaking to the moogle and restocking your potions, then grab some
softs. After you have saved your game, have everyone equip the jelly ability, as
you will need it here. When you are ready, head to the top of the screen, then
to the giant door on the next screen, and wait for it to open.
Walk through the door, then up the stairs there and grab the rising sun. After
obtaining this, head through the opening on the left and grab the elixer, then
touch the blue orb in the room to change it to red.
Take the remedy from the chest under the platform you are on, then head through
the opening on the left. In here, you will find a chest with a diamond sword and
another chest with shield armor. Grab these and head up the stairs at the bottom
of the screen.
|
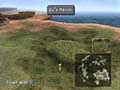
Qu's Marsh, a good place to stop for some frog
catching. |
Take the power vest from the chest to the right, then head up the stairs. Open
the chest up to obtain a set of feather boots, then activate the top left
projector, then the top right, then bottom right, then bottom left. If you
activate them in this order, you will get to see them all... note the name of
the last one.
Finally, continue up the stairs here, and on to the next screen. Stop to examine
the orb here, and then continue along until you return to the room where you
picked up the diamond sword.
Walk into the upper-left door to continue the story you have heard thus far.
After listening to the story, head out and to the right, then through the door
on the right of the next screen.
|
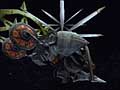
The massive Ark. If you refine two pummice pieces
with Hades later in the game, Dagger will be able to summon it. |
Take the gaia gear from the chest on the right-hand side, then equip everyone
with the clear headed ability and speak with the moogle here. Deliver your
letter and save your game, then head through the door on the right and step onto
the platform.
When the platform reaches the bottom, walk up and attempt to take the gulug
stone. Instead of getting the stone, however, you will end up having to fight
Ark.
So long as you have clear headed and auto-potion equipped, this battle is
relatively simple. Have Zidane steal until you have the holy lance, and order
the rest of your members to attack. After a short while, the battle will end, so
just grab the gulug stone.
Principle Character(s): Zidane, Quina, Freya, Amarant, Vivi, Eiko,
Dagger, Steiner
When control is turned over to Regent Cid, head down and through the right-hand
side door. From here you will have a little game to play, with only six minutes
until everyone dies. When the hedgehog is turned away, move forward, but if it
sees you, then you will have to run back and start over with whatever time is
left. When you finally obtain the hourglass key, Cid will then have to unbalance
the scales.
When you get to the scale and weights, examine the weights, then place the clay,
stone, and iron weights on the scale and climb aboard. Cid will then flip the
hourglass, and everyone will be set free. After they reunite, head to the right
and talk to the moogle to save your game and get a letter.
|
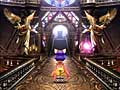
The properly lit candelabra. |
Run to the left twice, then head up the stairs and light the candelabra on the
left. Inspect the stone on the right, and you will receive the promist ring,
then head up the stairs.
When you see the statue of an angel surrounded by two demons, run to the right,
then to the left, and you will make a staircase appear. Ascend the staircase,
and light the candelabra up there, then return and go to the right, where you
will find a chest containing fairy earrings.
Head to the left and ascend the staircase there, then ignite the three braziers
and run through the mirror. Upon reaching the other side, ignite the bottom-left
brazier and return to the other side, then ignite the two braziers above the
stairs. Next, ignite the two far-right braziers, then the bottom brazier, and
you will see a glowing bloodstone.
Inspect the bloodstone, and you will receive an anklet, then leave through the
opening on the right. Ignite the candle on the right here, then extract some
shield armor from the bloodstone and continue down the hall and up the stairs.
|
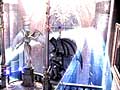
This is what the staircase looks like when you
make it appear. |
Ignite the candelabra here, then head down the hallway for two screens, and you
will find yourself in the library. Ignite the candelabra on the left, then
ascend the stairs and ignite the candelabra up there. Walk through the door that
opens and inspect the bloodstone to obtain the n-kai armlet, then return and
climb the ladder and ignite the candelabra up there. Finally, walk through the
doorway that opens here.
Run up the stairway and ignite the two candelabras along the way, then return to
the library. Ignite the last candelabra here, then walk through the third
passage and ignite the candelabra in there. Once again, return to the library
and walk to the left side and speak to the moogle Mogsam, deliver your letter,
and save your game.
Walk to the left here and ignite the two candles to activate a bloodstone, from
which you may extract a black hood. Grab this and head through the opening and
to the other side, where you may extract a venetia shield from the bloodstone
that is activated by lighting the three candles you find there.
Next, extinguish the candle in the middle here, then cross back over to the
other side and extinguish the left candle, and a staircase will appear. Return
to the moogle and equip your party so that Dagger can cast leviathan, if she has
not already learned that summon, and then either choose to use carbunkle for
reflect, or cast reflect and use carbunkle for haste. When you have made your
decisions, save your game and head up the staircase and light the final
candelabra.
|
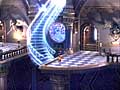
The second magical staircase. |
Before the fight takes place, the defense system will attempt to detect active
bloodstones, and if you missed any, it will draw a bonus of some form from it.
Hopefully you got each one listed above, so you should be fine. Eiko should use
carbunkle every third turn and use a potion on the others. Steiner should
attack, Vivi should use blizzard, and Dagger should summon leviathan, which only
works part of the time. After a rather easy battle, however, the Vilia Pria will
be defeated.
Because the defense system prevented you from lighting the candelabra before,
walk up to it and light it now, then step onto the glowing area to transport
out. At this point, the scene will shift to Zidane and crew. Simply run back to
the teleporter here and you will come out near Kuja's chamber.
Kuja beckons Zidane to come to him alone, so do so. Outside, however, the rest
of the party reunites and rushes in to stop Zidane from giving Kuja the gulug
stone. Despite their effort, however, Eiko ends up getting kidnapped and Kuja
takes the gulug stone anyway.
When Kuja leaves, assemble a party and grab the namingway card from the
lower-left portion of the screen, then leave his quarters and run back to the
teleporters, taking the one on the left. Run past where the Hilda Garde 1 was,
and you will come to a ledge. Kick the switch, then climb down the ladder and
run to the top of the screen, where your party will get back into the ship and
head off after Kuja.
Everyone will then disembark, and Esto Gaza will be to the east. You will also
have one more chance to switch around your party members, but if you chose well
before, you shouldn't need it. Simply head to Esto Gaza for the game to
continue.
Principle Character(s): Zidane, Quina, Freya, Amarant, Vivi, Dagger,
Steiner
Upon arriving at Esto Gaza, head inside and speak with the bishop, then walk to
the right to come to the shop. Purchase what you need, then run around the shop
to grab a wing edge from the chest.
Next, talk to the bishop if you want your party to rest, then walk up to the top
of the screen, where you will find a moogle. Read the letter she has, then take
the one she wants you to deliver and save your game. Continue to the right of
the screen, and you will come to some giant doors.
|
Here you will find Esto Gaza. |
Principle Character(s): Zidane, Quina, Freya, Amarant, Vivi, Dagger,
Steiner
Head to the left and search the bottom-right corner of the screen for 9,693 gil,
then climb the ladder, grab the ether up here, and head through the opening on
the left. down the ladder here, and you will come to a platform with a red hat.
Grab it, then return to where you entered this place.
Run to the right, through the next little structure, then to the far right of
the platform here to jump up to another. Continue to the right, into a cave, and
walk along the planking to a chest that has a golden hairpin in it. Grab this,
then leave and climb down the rope to the platform that you jumped from.
Next, head to the right and deliver your letter, obtain another, and save your
game with the moogle. Afterward, grab the wing edge from the bottom right and
continue out the right side of the screen.
To the right, you'll find a series of staircases to ascend, and these staircases
will bring you to a screen with a set of gaia gear at the dead end. Finally,
return to where the moogle is, and you will be attacked by two red dragons along
the way. Dispatch them and continue on. Save your game when you reach the moogle,
then head left from where you came down on the rope.
Head to the far left, and you will come to another run-down building. Grab the
demon's mail here, then head out and up into the cave entrance you find. In
here, you will find a moogle. Deliver your letter and buy some items from the
mogshop, then save your game and continue up the stairs here.
In the crumbling building you find here, you will be attacked by another red
dragon; kill it, then grab the elixer and return to the well. Pull the lever
down three times, and this will open up the well so you can head down one more
level.
Two red dragons will bust in down here, creating a hole. Dispatch them, then
rush through the hole, where you will find Eiko. Eiko is being attacked by Zorn
and Thorn, who are attempting to suck eidolons from her.
In an effort to protect Eiko, Mog reveals her true form and becomes Madeen,
defeating Zorn and Thorn. The rest of the party comes in at this point, and Vivi
runs off after Kuja when Kuja leaves. If you had Vivi in your party before, then
Eiko will replace Vivi. Meltigemini will then form from Zorn and Thorn and
proceed to attack your group.
In the beginning of the battle, Meltigemini will virus everyone, so make sure to
use vaccine on everyone, then have Zidane steal until you have the golden
hairpin and the demon's vest. Next, simply assault the monster and it will die;
the battle is not difficult.
After the battle is over, you will meet Lady Hilda, and Cid will rejoice at
seeing her. The black mages will abandon Kuja, and everyone will return to
Lindblum.
Principle Character(s): Zidane, Quina, Freya, Amarant, Vivi, Eiko,
Dagger, Steiner
When Zidane wakes up, head up to the moogle, get the letter, and save your game.
Afterward, head to the conference room, where Lady Hilda will hold a meeting,
divulging what she knows. Cid will also mention that construction on the Hilda
Garde 3 has begun.
During the meeting, however, you will find that Dagger is not there, and Steiner
will take off in search of her. After he does, you will get to watch an Active
Time Event where Steiner learns a bit more about how the world works.
The discussion will again be interrupted by another Active Time Event, and this
one focuses on Cid showing the engineers how to construct the Hilda Garde 3.
After that, Hilda will continue to discuss the need to go to Ipsen's Castle,
then Steiner will bust in, letting you know that he can't find Dagger.
Zidane runs out to find Dagger in Alexandria. When he gets there, Baku brings
him over to see Beatrix instead, and Beatrix gives you a garnet and then tells
you where Dagger is. When you find Dagger, she will rush off and cut off her
hair, then you will all board the Hilda Garde 3.
Because you are now in an airship, this is an ideal time to wrap up some of the
optional quests that have been put off thus far. The following are some quick
notes on them that should assist you. If you do not wish to bother with them,
then simply skip to Ipsen's Castle. Note: To see the extended ending, you will
need to collect the stellazzio at Daguerreo and Alexandria, as well as the rest
later on.
Talk to the little girl running around next to the inn to pick up the Alexandria
card, then head to the bottom-right side of the screen for a remedy and to the
bottom-left for an amethyst. Now head up to the next screen. On the left of this
screen, you'll find a topaz, and on the steps on the right, you'll find 4,832
gil.
Head across the water to the castle here and go to the statue of Neptune to pick
up the Leo in the upper-right corner of the room. Next, return to the screen
where you rode the ferry, and you can get a sapphire from the rubble. Stop by
any of the shops if you like, then leave when you are ready.
|
The location of Daguerreo. |
When landing here, you want to be cautious as you approach Daguerreo. There are
two enemies out here that you want to be careful of: the gimme cat and the grand
dragon. Quina can gain abilities from eating both, notably the auto-life from
the gimme cat, and the grand dragon will give you 35,000 experience points.
While the gimme cat is not that difficult, the grand dragon will be very
difficult, although it can be killed in one shot if Quina has eaten a zombie
whale on the south shore of the Forgotten Continent and learned Lv5 death.
Upon entering Daguerreo, head to the right and you can find the Capricorn.
Afterward, head back to the left side of the screen and through the opening
here. Before you is a puzzle that you need to solve so that the weaponsmith can
sell you weapons and armor. What you need to do is move the far-left platform to
the bottom, then examine the hole. After you have checked out the hole, pick up
the pole on the right and jam it in there.
|
The location of the Capricorn. |
Once you have fixed the lifts, head back to the right and continue further to
the right until you come to the synth shop. Purchase anything that you don't
already have, as you can learn some great abilities from what he has here.
Continue to the left and speak with the lady at the desk here if you want to
purchase any items. Otherwise, continue on to the left. Push the button you
eventually come to, then continue to the left and talk with the old man looking
for book you come across. On the right-hand side of the screen, you will find
the book the old man is looking for, so return and tell him about it.
Next, let him move out of your way, then walk back where he was and head down
the ladder. Down here, talk to the guy on the left, and he will offer to rename
your characters if you have the namingway card. You can also find an elixer at
either end down here.
|
The correct entrance to South Gate for this
quest. |
Finally, head back up the ladder and through the opening to your right. Speak to
the guy at the weapon and armor shop here, then, on your way out, check out the
mural of the dragon god and, if you drop in five ore, you can get an amethyst.
If you head to the main South Gate area and walk up the stairs, you will see a
wagon with a ladder next to it. Climb the ladder, and you can get the elixir
card.
After you finish the chocograph quest, this one is pretty easy. Head to the east
side of the mountain next to Esto Gaza on a reef chocobo and feed it a dead
pepper next to the crack, then enter Mognet Central.
Speak with Artemicion, and he will explain what you have already heard, that he
used too much of a "thing." Afterward, speak to Kupo in Alexandria,
who gives you a letter to Atla in Burmecia. Speak to Alta, then she will give
you a letter for Mogryo in the Black Mage Village. Mogryo will give you a letter
to give to Kumool in Ipsen's Castle, who will then give you a letter to give to
Mois in Qu's Marsh near Fossil Roo (this last letter requires Quina in your
party). Mois then asks you to send a letter to Noggy in Daguerreo, who sends you
back to Kupo in Alexandria.
After delivering the final letter, speak with Ruby, and she will give you the
superslick. Give this to Artemicion, and mognet will be restored and you will
obtain a protect ring.
If you return to Treno, there is a new monster, as well as some new items in the
auction. This detour shouldn't take long, and it can yield some nice prizes.
Make sure to also return here to drop off the stellazzio that you have been
collecting.
When you take up your quest again, there will be several areas that you will no
longer be able to return to, as Gaia will drastically change. If you have any
business in the following areas, you will want to get it taken care of now.
Conde Petie
Desert Palace
Oeilvert
Observatory Mountain
Esto Gaza
Ice Cavern
Pinnacle Rocks
Principle Character(s): Zidane, Quina, Freya, Amarant, Vivi, Eiko,
Dagger, Steiner
When you first get here, Amarant will challenge you, saying that he could find
the mirrors on his own. Naturally, Zidane takes him up on this offer, and
Amarant heads off.
After Amarant is gone, head up the stairs and open the chests on either side of
the entryway. To the left you will find a dagger, and to the right is the
Aquarius. Equip the dagger right away as, strangely enough, the weakest weapons
you have will do the most damage here. Stronger spells, however, do inflict more
damage.
Continue up the steps at the top and through the opening here, then speak to the
moogle on the other side. You should have a letter to give Kumool, and you will
probably want to save your game. When you are done, slide down the pole here and
walk over to the ladder.
|
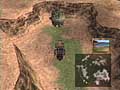
Here is where you will find Ipsen's Castle. |
Climb the ladder to the balcony and exit via the left-hand side. Walk up and
head through the next door here, and you will come to a ladder. If you climb up,
there is a javelin and a broadsword to the left and to the right, respectively.
Grab them if you need to, then climb down the ladder.
Walk along the balcony here to the next ladder and climb all the way to the top.
Enter through the opening here. Examine the right wall and perform the following
actions: push, pound, think, push, try something drastic, rest. This will open
the door and put you on the next screen automatically.
Grab the barette on the right side of the balcony here, then head to the top of
the screen, where you will step onto an elevator. Amarant, who is already here,
will gloat a bit and then leave the room. When he does, grab the four mirrors
and prepare for a nasty fight.
|
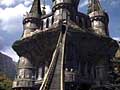
The entrance to Ipsen's Castle. |
After obtaining the four mirrors, Takarka will emerge and assault the group.
Make sure that you have Zidane steal the orichalcon from it, and have the rest
of your group use fire-based attacks such as flare or flare sword. When Takarka
curls up, do not use physical attacks, as they will yield very little damage.
Considering how late in the game it is, Takarka is relatively easy and should
fall quickly.
Return to where the moogle was and head to the upper-right area of the screen.
Zidane will fall next to a chest, in which you'll find a maiden prayer. Take the
maiden prayer, then climb back up the pole and speak to the moogle to save your
game.
Next, leave the room via the left side, which may take a while due to the trap
doors. When you get to the next screen you may leave, if you choose, or head
through the middle opening to get an important item.
If you choose to get the item, head down the next two screens and ride the
elevator down. This will put you in a room with a glowing sword on the wall.
Open the chest here to obtain a golem's flute, and then look at the vases. Move
the right vase to the upper-right perch and the left vase to the lower-right
perch. Then move the upper-right vase to the left perch and the lower-right vase
to the upper-right perch. This will cause the sword to glow brighter and, by
picking up the vase in front of you, you will receive the ancient aroma.
Finally, head back to the entrance to leave Ipsen's Castle. Run down the steps,
and you will discover that Amarant hasn't emerged yet. When you hear this,
Zidane will rush in alone. Head to the top right of the first screen, then down
the pole. Head to the bottom of the screen, and you will see Amarant lying
there, near death.
After some dialogue, Amarant will join back up with you. Make sure to equip him
with the worst weapon you have for him, then leave Ipsen's Castle again. Once
you are back out, Zidane will recap what happened inside. Take special note of
where the mirrors are, and copy down their locations if necessary.
Everyone will then head onto the airship. When they do, stop what you are doing
and return to the bridge to equip everyone with the best possible items. Since
each party will consist of only two members, the following section will be
rather difficult.
Principle Character(s): Zidane, Quina, Freya, Amarant, Vivi, Eiko,
Dagger, Steiner
Begin by dropping Eiko and Dagger off at the water shrine, then drop Amarant and
Freya off at the fire shrine. Leave Steiner and Vivi at the wind shrine, then
head to the earth shrine with Quina.
Now, because this is the earth shrine, you will want to have auto-float equipped
on both characters if possible. Make sure you also equip auto-potion since you
don't have a healer and counter to get in an extra strike whenever possible.
Stone killer won't hurt you, either.
When you are ready, head down the stairs and you will come to a trap. When an
exclamation point appears over Zidane's head, press the X button to jump, and
the screen will then flick to Eiko and Dagger.
|
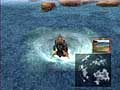
The location of the water shrine is here. |
On the next screen, Quina will rush up and notice a place to put the mirror.
Follow her, and, when you are ready to fight the boss, place the mirror on the
pedestal.
The scene will now shift to the various parties at different shrines, each
encountering their boss. Afterward, the Earth Guardian will attack Zidane and
Quina. When he does, have Quina cast mighty guard, then have Zidane steal until
you have the avenger and the rubber suit. Once these items are in your
possession, finish this beastie off with attacks and Quina's blue magic.
After the fight, Zidane will automatically pick everyone up and you will find
yourself at the water shrine. Land the airship somewhere to give yourself a
chance to equip your party members appropriately. Make sure to equip the devil
killer ability and save your game.
|
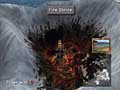
You will find the fire shrine near Esto Gaza. |
Principle Character(s): Zidane, Quina, Freya, Amarant, Vivi, Eiko,
Dagger, Steiner
Upon arriving, you will meet with Garland. After a short discussion, he will
insult Zidane, and Dagger will come up to you, letting you know that everyone is
waiting.
On the next screen, you will see a girl, who runs away from you. Instead of
following her, head down the steps, and you will find a short jumping puzzle,
from which you may obtain a coronet and a dragon wrist. Grab these, then head
back to where you saw the girl and head up.
|
Shimmering Island's location. |
Grab the elixer from the chest on the left of the next screen, then head up
after the girl again. Head across the bridge here, and Zidane will lose the
girl. When he does, climb down the web at the far right to drop to another
platform.
If you climb down the next web here, you will find yourself next to a remedy.
Grab it if you like, then head to the left and jump over the gap there. After
jumping over the gap, grab the mythril racket you find in the chest there, then
head down the web.
Grab the demon's vest from the chest here, then approach the girl again. Speak
to her, and she will lead you to another bridge. Speak to her again on the
bridge, and she will tell you to continue on.
On the next screen, you will see a staircase. Ascend the staircase and head
through the tunnel on the left to find a chest containing Minerva's plate. Take
it, then return and head up the next set of staircases to Bran Bal.
Principle Character(s): Zidane, Quina, Freya, Amarant, Vivi, Eiko,
Dagger, Steiner
This section begins with a cutscene where the Invincible takes off, and, seeing
it, Dagger swoons. After everything is finished, Zidane will head off in search
of a place for Dagger to rest. When control is finally turned over to you, head
to the left.
If you walk under the stairs, you will find a flash hat. Grab that, then return
to the bottom of the staircase and grab the angel earrings on the right. After
you have them, head into the first building on the left, and you will find a bed
for Dagger.
Eiko will begin to bug everyone for some medicine, but she will not find any.
Instead, the scene will eventually shift back to Zidane and company looking over
Dagger in bed. After the dialogue is done, Dagger will wake up, and Zidane will
be by himself.
Walk back into the inn and grab the elixer from the chest, then, since it has
been awhile since you've seen a moogle, head to the far right of the town and
step into the building on the right. In here, you'll find a chest with a wing
edge in it and a jar with a moogle in it. Save your game here and stop by the
mogshop; you can buy a really nice weapon for Zidane if you don't already have
it.
Next, leave and head through the door on the left, then walk down the stairs.
Speaking with the girl down here will trigger a series of events, and eventually
you will learn a great deal about Zidane. The scene will then shift to Eiko.
Watch the ATEs that occur and head to the location of each person involved in
the ATE. This will enable you to get a party together. Finally, head up through
the green portal and across the bridge.
Speak to the girl on the stairs here, and Eiko will flip out, then head back for
everyone else.
Principle Character(s): Zidane, Quina, Freya, Amarant, Vivi, Eiko,
Dagger, Steiner
When Zidane steps through the teleporter, walk forward to the next screen, and
you will come to Garland. The next ten minutes or so are taken up with Garland's
dialogue. Simply follow him along while he talks, and eventually the screen will
shift to Kuja, then back to Zidane being woken up by Eiko and Vivi.
After being almost unforgivably rude to Eiko and Vivi, Zidane will leave them
and end up in a fight with an amdusias. He will be joined by Freya and Amarant
in short order, however, so do not worry.
|
Here's where you will find the holy miter. |
Once the fight is over, Zidane blows Amarant and Freya off as well and continues
on. He eventually steps in to assist Quina and Steiner against an abadon.
Naturally, he then abandons them as well.
Finally, Zidane will end up in yet another fight, this time with a shell dragon.
Dagger jumps in here to save him, and after the fight she, with the help of
Steiner and Quina, brings him to his senses. At this time, the party will
regroup and head off to get Eiko, Vivi, Amarant, and Freya.
When you meet up with the rest of your team, you will get to choose which
members to take with you, and you will have the chance to save your game with
the moogle here. After you are done, head to the right until you get to where
Zidane started out, and you will find a holy miter.
Take the holy miter, then head back to the last place Zidane was when he was
fleeing from everyone. On the next screen to the left, you will find a button
that you may press. Upon pressing the button, you will have 30 seconds to reach
the other side and cross the bridge. Do not, however, step near a blue light, as
they will force you into a battle, and your time will run out. Fortunately, you
may try this as many times as you need.
In the next room, play with the alien device and set the heading to 4. Continue
into the next room and ride the elevator (by taking the upper path) up. Then
walk all the way up and ride the elevator up one floor.
From here, head to the right and take the transporter up one floor, then take
the left teleporter and grab the carabini mail from the chest at the end. Return
to the teleporter and walk to the far-right teleporter and use it.
Teleport back up and use the central teleporter to return to the area with
the elevator. From here, take the bottom spur to the teleporter on the left.
Head to the lower teleporter on this grouping and teleport up twice to get some
battleboots, then teleport back down twice and take the teleporter to the upper
right from the one that you teleported up twice from.
Next, teleport up twice here, and you will come to a moogle. Deliver the letter
that you have, then stop and set up your party. You will want locomotion and
auto-potion equipped on everyone, as you are about to fight three bosses without
any break in between them.
The first boss, the Silver Dragon, is not overly difficult. If you have Vivi in
your party, have him use blizzaga. Eiko should use madeen, and Zidane, Amarant,
Freya, or Steiner should attack. Have Dagger cast bahamut, and have Quina either
cast night or simply attack. Regardless of who you have in your party, you
should not have to worry too much during this battle.
Next, Garland will take a stab at defeating you. In the beginning of the battle,
use a tent on Garland. If it does not work, then try again. Eventually, Garland
should be affected by silence, at which point your auto-potion should take over
for any damage that he does to you. Have Zidane steal from him while the rest of
your party uses physical attacks to conserve MP. When the battle is over,
Garland will simply acknowledge your powers, at which point Kuja will come down,
interrupting everything.
|
Kuja descends. |
Regardless of what you do, the battle with Kuja will be extremely difficult.
While you can steal some nice items from him, your chances of doing so are very
small, and you will need Zidane's extra firepower. Also, whatever you do, do not
use a tent on Kuja, as it will heal him instead of having any adverse effects.
If you have Eiko in your group, use carbunkle's ruby light each and every turn
to make sure that there isn't a gap in your coverage. Have the rest of your
party members either attack or use magic as you see fit and just hope that you
can survive. At the end, Kuja will end up trancing, and he will totally
transform. At this point, he will use ultima and wipe out your party.
A long dialogue occurs at this point, and Kuja learns that he is a mortal and
will soon pass away, much like the black mages he hates. During this time, he
ignores Zidane and company, allowing Zidane and Dagger to rush off to save the
genomes while everyone else boards the Invincible.
Head to the bottom right-hand side of the screen and run along the bridge that
appears here. When you get to the other side, Dagger will spot a teleporter. At
this point, Zidane and Dagger will split up, then Zidane will rush down to save
Mikato, the last genome. Once everyone escapes to safety, the ship will take off
and return to Gaia, and you will discover that all of Gaia is covered in mist.
Disc 4 is, by far, the shortest of all the discs. While you may explore the new
map, which has changed drastically, there is really only one place that you need
to go to once you have your freedom during this disc. If, however, you wish to
see the extended ending then you will want to finish the stellazzio side quest
at the very least.
Principle Character(s): Zidane, Vivi, Steiner, Dagger, Freya, Amarant,
Quina, Eiko
Disc 4 starts off with everyone in the Black Mage Village, dropping off the
genomes. Unfortunately, the Invincible will take off without giving you a chance
to purchase anything, so you may wish to return and obtain a few highly
desirable items.
|
A genome and a chocobo, this ought to be
interesting. |
As with the end of Disc 3, there are a few side quests that you may want to wrap
up here, especially since one of them in particular must be completed if you
want to see the optional ending. If you want to finish the game without the
optional ending, it is possible to get rid of the item that triggers this ending
in the last level, so as long as you have some ore, don't worry about not being
able to see the normal ending.
When you are onboard the Invincible, press the triangle button to head to the
bridge and walk to the bottom of the screen. Once there, open the chest on your
left and you will obtain the 12th stellazzio, Pisces.
Head over to Daguerreo and talk to the old man next to the inn. He will tell you
that he is looking for a magical fingertip, and that he would be very pleased if
you would obtain it for him. Simply head over to the Treno auction and wait for
it to be auctioned off, then purchase it and hand it to the old man. In return,
he will hand you Excalibur. This quest can be done in addition to your other
duties in Treno, which are listed below.
Return to Treno and turn in your stellazzio. You should have had the opportunity
to turn in most of the 12 stellazzio at this point, so turn in the rest and
speak with Queen Stella yet again to discover that one is missing, a 13th
stellazzio. Agree with the queen, and she will return the stellazzio to you.
Read the backs of them all, then head back to Vivi's old place and search where
the Scorpio was, and you will find the 13th stellazzio. Return to Queen Stella,
and she will give you a hammer, enabling you to see the extended ending when you
beat the game.
While here, you may also want to fight the next caged beast. If you do, however,
use either Zidane or Steiner and make sure you have beast killer, counter,
auto-life, auto-haste, and auto-potion equipped. Even then, however, it is a
toss-up, and you will be lucky if you can defeat the beast. If you are able to,
however, you will receive a circlet. Note: Using soul blade with the sargatanas
equipped will petrify the behemoth.
You may also, of course, stop at the auction, but there really isn't anything
good there at this time.
Have Dagger in your party and head to Madain Sari, then go to Eiko's back porch.
Lani should be here and, when she sees you, she will run away. Leave Madain Sari
and reconfigure your party so that Dagger and Amarant are not in it, then
return.
Lani should stay put this time, so talk to her until she mentions "some
words" in the room next to you. When she does, head into the door here and
move to the bottom of the screen, where you will have an exclamation point.
Press X, and Zidane will be able to read the writing there.
Leave and head for the eidolon wall. Upon arriving, walk to the right until you
hear a noise, then turn around and walk to the left until you hear a noise.
Repeat this, walking back and forth, until your HP and MP are restored and the
status effects are removed. When this occurs, read the inscriptions on each of
the eidolons, then return to Ifrit and read his to find out Dagger's true name.
Principle Character(s): Zidane, Vivi, Steiner, Dagger, Freya, Amarant,
Quina, Eiko
Upon reaching Memoria, you will be able to witness another one of those
incredible cutscenes. This time, Cid's airship fleet will come in to assist the
Invincible in reaching Memoria. Attempting to stop them, however, is an entire
horde of dragons. After a good amount of cannon firing and dragon smashing, you
will end up fighting your first boss.
Use a tent on the Nova Dragon right away, then proceed to use ice magic and
skills. Do not perform any physical attacks to make your healer's job easier.
You will also want to have one designated healer, either Eiko or Dagger, and she
should not do anything else.
|
The location of Memoria. |
After the battle is over, your group will congregate outside of Memoria, and you
will have a chance to change your party around. Pick what you feel will be the
best one, and then run through their abilities and items and run up the walkway.
When you arrive at the top of the stairs, a question mark will appear above
Zidane's head. From this point, you can move back and forth between Memoria and
the Invincible at will, so if you need to make any more preparations, now is the
time to do so.
Once you are finished, head up the stairs here, and you will see a glowing orb.
Treat this like you'd treat a moogle, for it will allow you to do the same
things (with the exception of mognet or mogshop). Save your game here, then grab
Kain's lance from the right-hand side of the screen and continue up to the next
one.
Head up the stairs on the next screen, then climb the stairs back and forth on
the next, stopping at the little ledge near the top left. If you search here,
you will find the weapon known as the tower. Take this, then continue on your
way.
When you get to the next screen, you should prepare for a boss fight. Equip
everyone with demon killer and body temp. When you're ready, walk down the isle
here, and Maliris will attack you. The best method I've found for beating this
boss is to have anyone who can attack with ice-based magic do so, otherwise use
physical attacks. Keep your healer on idle by using the triangle key and heal
anyone who gets injured. You want to keep your party near full HP in this
battle, because Maliris' finishing move is nasty.
On the next screen, watch the destruction of Alexandria, which is projected for
you, then walk up and grab the angel flute on the left side and save your
progress on the right side. You will also want to equip clear headed for the
next boss fight that you have coming up.
Head out to the right, then up the stairs on the next screen. After a bit of
dialogue between Zidane and Garland, walk to the left side of the screen to grab
the rune claws, then head up toward the giant eye when you are ready.
Instead of being an overly offensive enemy, Tiamat relies more on
"snorting" your characters away. It is very important to keep this
from happening, and if you are able to do so, Dagger, Steiner, Vivi, and Zidane
should do very well. Have Zidane attack Tiamat each time, and have Vivi and
Steiner focus on blizaga and blizaga sword magic, respectively. Dagger should
either call Odin or heal party members as needed. With the above formula, this
battle should be over quickly, especially if Zidane and Steiner have counter
equipped.
Head up the stairs on the next two screens, then to the left on the following
one. Continue up the next staircase and, eventually, you will come to a glowing
orb. Save your game here, and use a tent to recover any lost MP. Then head
behind the waterfall. At this point, you have a decision to make.
If you have followed the walk-through thus far, then you have received the
hammer for completing the stellazzio quest. Because of this, you will see a
different ending than you would have if you did not have the hammer. If you
would like to get rid of the hammer, then walk to the right area and rapidly hit
X to find and challenge Hades. Then, after you beat him, synthesize the tin
armor to get rid of the hammer. You may even want to defeat Hades just for the
other items that he will allow you to synthesize, but that is up to you.
If you decide to fight Hades, have everyone equip antibody, body temp, and clear
headed, and try to get Zidane near trance. If Zidane trances, use his most
powerful trance, and Hades shouldn't last long.
When you are done here, continue up the steps and be prepared to face Kraken.
This battle will most likely be a little bit more difficult than previous
battles, but it should still be doable. You will want to have body temp equipped
for this battle, though, as your characters will get frozen easily if you don't.
During the battle, focus on physical and lightning-based attacks, forgoing
everything else. Take out the right tentacle first, then the left tentacle, and
then finally the Kraken itself. When the battle is over, continue up the steps.
Head behind the clock here, then to the lower-right corner of the screen, and
use the hidden save spot. You will also probably want to utilize a tent or two
as well. Before you save, make sure that you change the abilities on your
characters so that auto-float and locomotion are equipped. You should also equip
devil killer, if you can.
|
Hidden save point. |
When you are ready, head up the stairs and through the door on your left. Climb
the ladder that will be in front of you here, then continue up the ladder on the
next screen. Before ascending the final ladder, check the top-left portion of
the platform here for the mace of Zeus. Take this, then continue up the ladder
to face Lich.
This boss is not terribly hard. Have your healer cast curaga on your whole team
whether you need it or not (you will eventually), and involve everyone else with
either fire-based or physical attacks, leaning toward fire-based ones whenever
possible. After the battle, move to the upper-left side of the room and use the
hidden save point.
Finally, when you are ready, walk off the end at the top of the screen and,
after some dialogue, Zidane will find his way to the Crystal World. Upon
arriving, head forward, down the crystals, for three screens. When you reach the
end, you will come to a save orb. Use a tent or two here, then save your game.
At this point, you can remove your auto-float ability and exchange it for
something that suits your playing style more. Make sure, however, that the
characters that use physical attacks have bug killer and devil killer equipped,
then proceed up the screen.
Deathguide has a lot of physical attacks that hit your whole group. Use protect
if you can, otherwise simply pound away on it with fire-based attacks and the
occasional physical attack, and you should do fine. After the battle, head back
and save your game again. You will also want to reorganize what abilities you
have equipped.
Because of the constant magic attacks that you will be bombarded with in the
next battle, auto-reflect will be a necessity. With this ability equipped, your
healer will be virtually useless, so make sure to equip auto-regen and
auto-potion so your characters can heal themselves. If you can, equip auto-life,
auto-haste, counter, and chemist - in that order of priority.
|
Necron, the man behind it all. |
In the battle against Kuja, it is best to manage each person as if they were
alone. Heal them when they really need it, but mostly count on your auto-regen.
Hit Kuja as much as possible, and delay as much as possible to let your
characters rack up the HP from auto-regen. Order each to use whatever attack or
summon you find to be the strongest, and do it again, and again, and again, and
again...
If even one character survives in your fight against Kuja, then you're fine,
despite the fact that you have one more enemy to defeat. After the battle, those
characters that you do not choose to fight the final boss will give their energy
to those who you do choose to send on, revitalizing them for the upcoming fight
against Necron.
Fight the last boss much the same way you did Kuja, only you will want to change
your abilities around quite a bit. Drop your auto-reflect and pickup antibody,
clear headed, and jelly, with loudmouth for your mages.
The last battle is more of a survival battle. The one thing that will really
help you, however, is to use a tent in the beginning of the match. This almost
cripples Necron, providing it works. Flare works really well, but your
main goal is to hold out until Zidane (or Dagger, if she is with you) trances,
then chip away at Necron with whatever you have left. Dagger's trance works out really
well here, so if you can, I recommend using her.
It is difficult, but it can be done. Afterward, regardless of whether or not you
see the extended ending, you will get to see what is probably the best RPG
ending ever seen. After the credits roll by and you see the words "The
End," you can even play a hand of blackjack by pressing the following
sequence: R2, L1, R2, R2, up, X, right, circle, down, triangle, L2, R1, R2, L1,
square, square, start. Have fun, and try out the other ending too.
<BACK>
